Hi everyone! It’s Lindsay here today and I am so excited to share today’s video tutorial with you all. Today’s video is all about adding dimension to digital stamps. I know that digital stamps can be a bit intimidating to use, but they are such versatile stamps and there are so many wonderful techniques to use with them. One simple way to use digital stamps to their full potential is by adding dimension into the mix so they aren’t just one dimensional. Watch the video below for all the details!

The Video Tutorial
This video tutorial contains products that were sent to me free of charge for design purposes. I only design for companies I can stand behind 100%! This post also contains affiliate links!
Digital Stamps
First and foremost, I want to start by sharing exactly what a digital stamp IS. A digital stamp is an image, or “stamp”, that is in digital form. This means that you don’t have a physical stamp, but just a digital file. These images can be used digitally or you can print them off and use them in your paper crafting! They normally come in both JPEG and PNG format.
For the tutorial today, you don’t need to know ANY digital stamping techniques. You just need to download the file and print it. It’s that simple! You won’t even need a specific printer for the coloring I am doing. Any printer will work as long as the ink is dry.
Making the Handmade Card
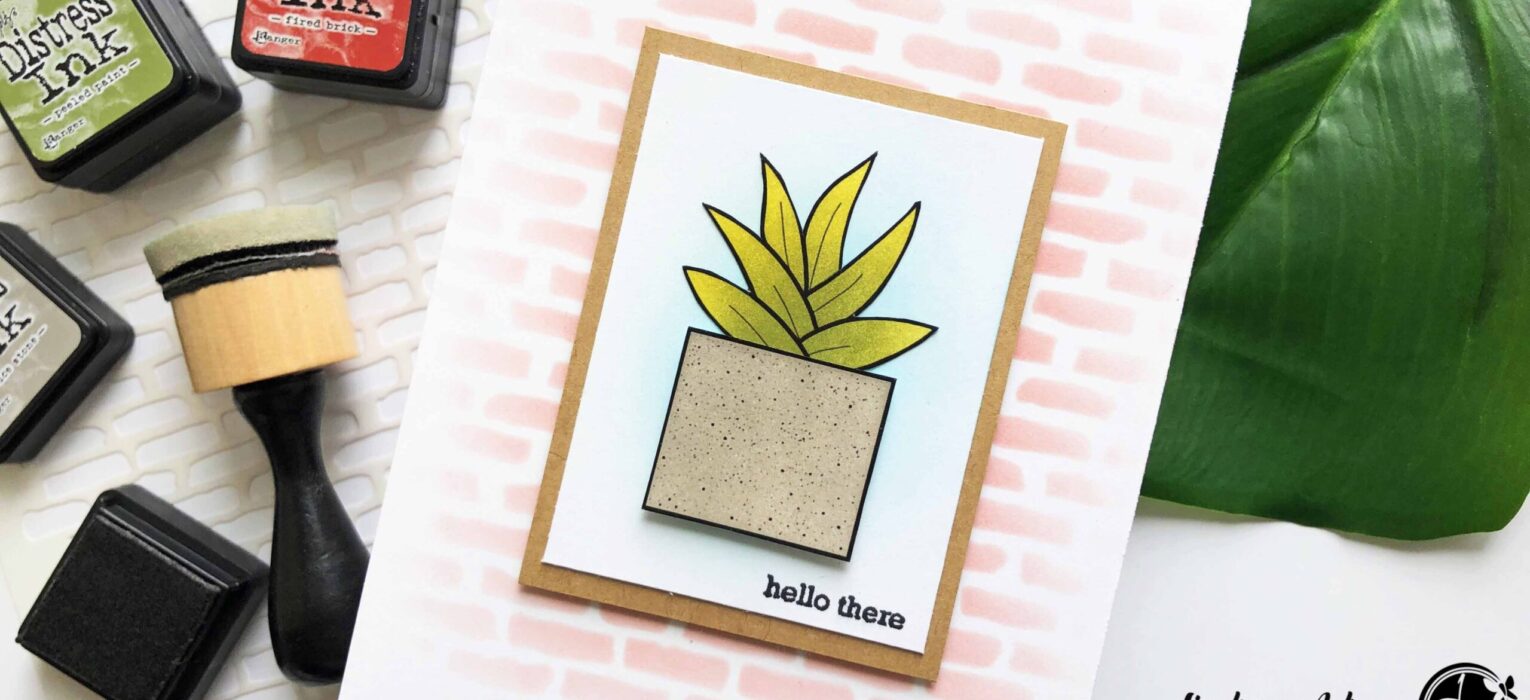
After printing the new “Potted Succulent” Digital Stamp Sheet, designed by ME, I just roughly cut out the image I wanted to use on my card today. Any of the images that are in this set will work for this technique, I chose to use the concrete planter succulent in the bottom left hand corner.

The Technique
Then comes the fun part! I cut the stamp in half. Right where the succulent plant meets the planter. For the stamp I used it was easy because it was a straight line. If you choose to use a different one, just cut along the line where the plant meets the planter.
To color each section of the image, I used Distress inks and a mini ink blending tool. I love to color this way because it is so quick and easy! Plus, it requires no special ink. The ink just needs to be dry! Then, I fussy cut the image up to the black lines. To give the pieces a finished look, I ran a black marker along the cut lines.

Next, it was time to put the image back together. However, I wanted to add dimension to the planter. This adds that dimensional layer to your card which adds more interest and a more realistic look! So I glued down the plant portion of the stamp with liquid adhesive directly onto the cardstock panel. Then, with dimensional adhesive, I added the planter.
Just adding dimension to that one layer will add so much interest to this simple card and the very simple image I used!

Finishing the Card
The rest of this card is really very simple. I added a bit of stenciling to the card base and I also added a very simple sentiment from the “Whale Hello There” stamp set for the finishing touch!
For more ideas using the “Whale Hello There” stamp set head HERE and HERE.

I hope you all enjoyed a look at how you can simply add dimension to your digital stamps for more interest on your handmade greeting cards! Digital stamps are so versatile, and I can’t wait to share even more techniques to use with them now that Joy Clair Stamps is carrying digital stamps!
To check out Joy Clair Stamps entire line of digital stamps that are available, head HERE. And if you are interested in any of the supplies I used on my card today, you can find them all down below in the supply list. Until next time, happy crafting!!
Supply List
Affiliate links are used
 Potted Succulents Digital Stamp Set Shop at: JCS |  Whale Hello There Stamp Set Shop at: JCS |  Tsukineko – VersaFine Clair – Ink Pad – Nocturne Shop at: SB.com | AMZ |  MISTI Stamping Tool – The Most Incredible Stamp Tool Invented Shop at: SB.com | AMZ |
 My Sweet Petunia – Creative Corners Shop at: SB.com | AMZ |  Makeup Brush Set of 10 Shop at: AMZ |  Tombow Mono Multi Glue Shop at: SB.com | AMZ |  Fiskars – 12 Inch Personal Paper Trimmer with Cut-Line Shop at: SB.com | AMZ |
 Teflon Bone Folder Shop at: AMZ |  2 Rolls Double Sided Foam Tape Shop at: AMZ |  Distress Ink Mini – Crushed Olive Shop at: SB.com | AMZ |  Distress Ink Mini – Peeled Paint Shop at: SB.com | AMZ |
 Distress Ink Mini – Pumice Stone Shop at: SB.com | AMZ |  Distress Ink Mini – Salty Ocean Shop at: SB.com | AMZ |  Distress Ink Mini – Fired Brick Shop at: SB.com | AMZ |  Ranger Ink – Tim Holtz – Mini Ink Blending Tool – Round Shop at: SB.com | AMZ |
 Ranger Ink – Tim Holtz – Mini Ink Blending Tool Replacement Foams – Round Shop at: SB.com | AMZ |