Hi everyone! It’s Lindsay here, from Crafting While Caffeinated Blog and YouTube Channel, and I am super excited to share a nother digital stamp along video with you all! Today, the digital stamp along is with the new “Oh La La” stamp set, one that is brand new this month. Be sure to watch the full video tutorial below for all the details!
The Video Tutorial
The video tutorial above contains products that were sent to me free of charge for design purposes. I only ever design for companies I can stand behind 100%! This post also contains affiliate links.
What Program I Use for Digital Stamping
Just in case you didn’t see the last video or read the last post I did, you might not know I do use Photoshop Elements for ALL of my digital stamping tutorials. It is not free. However, it is a one time purchase only. I use this program because I love it and use it for everything.
I could find a free program and share tutorials with that program, but that wouldn’t be an honest representation of what I use and love! And I would go right back to use Photoshop Elements when the camera is off.
Finishing the Handmade Card
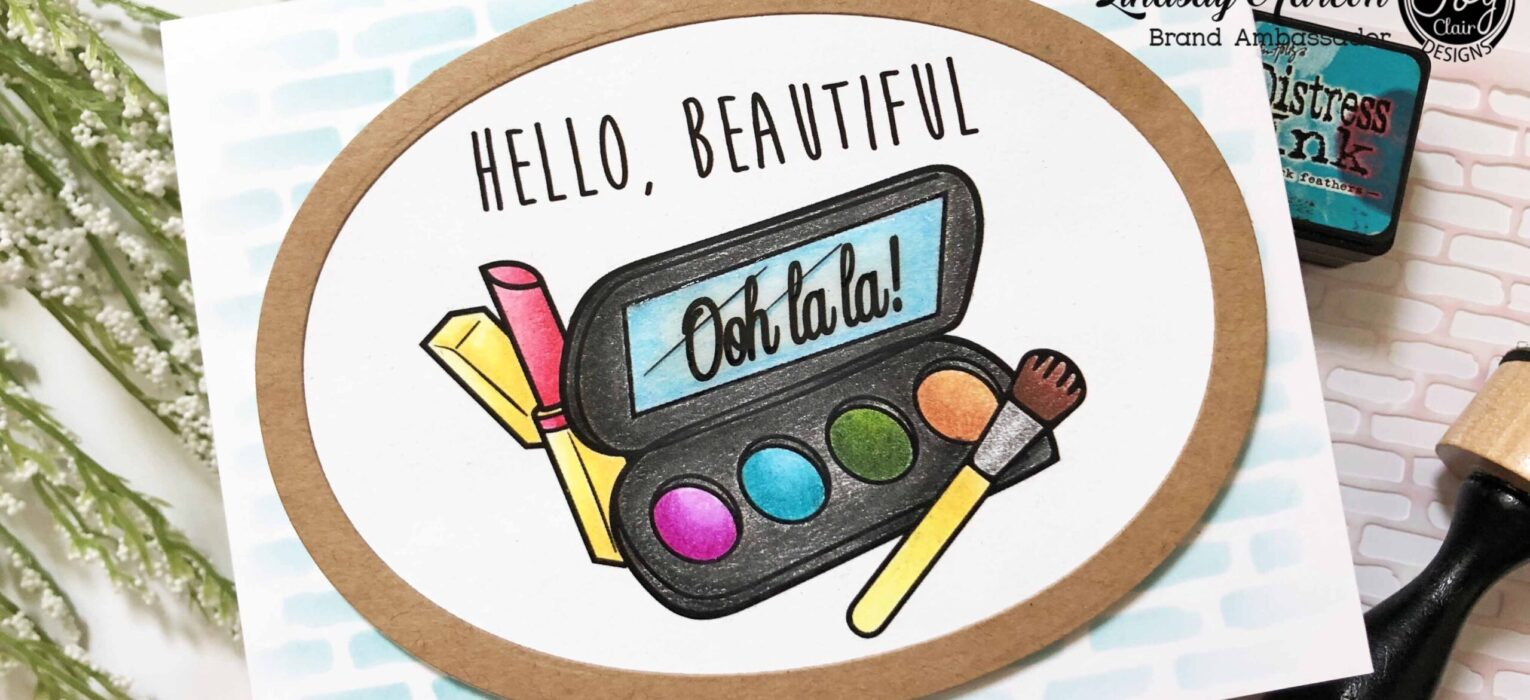
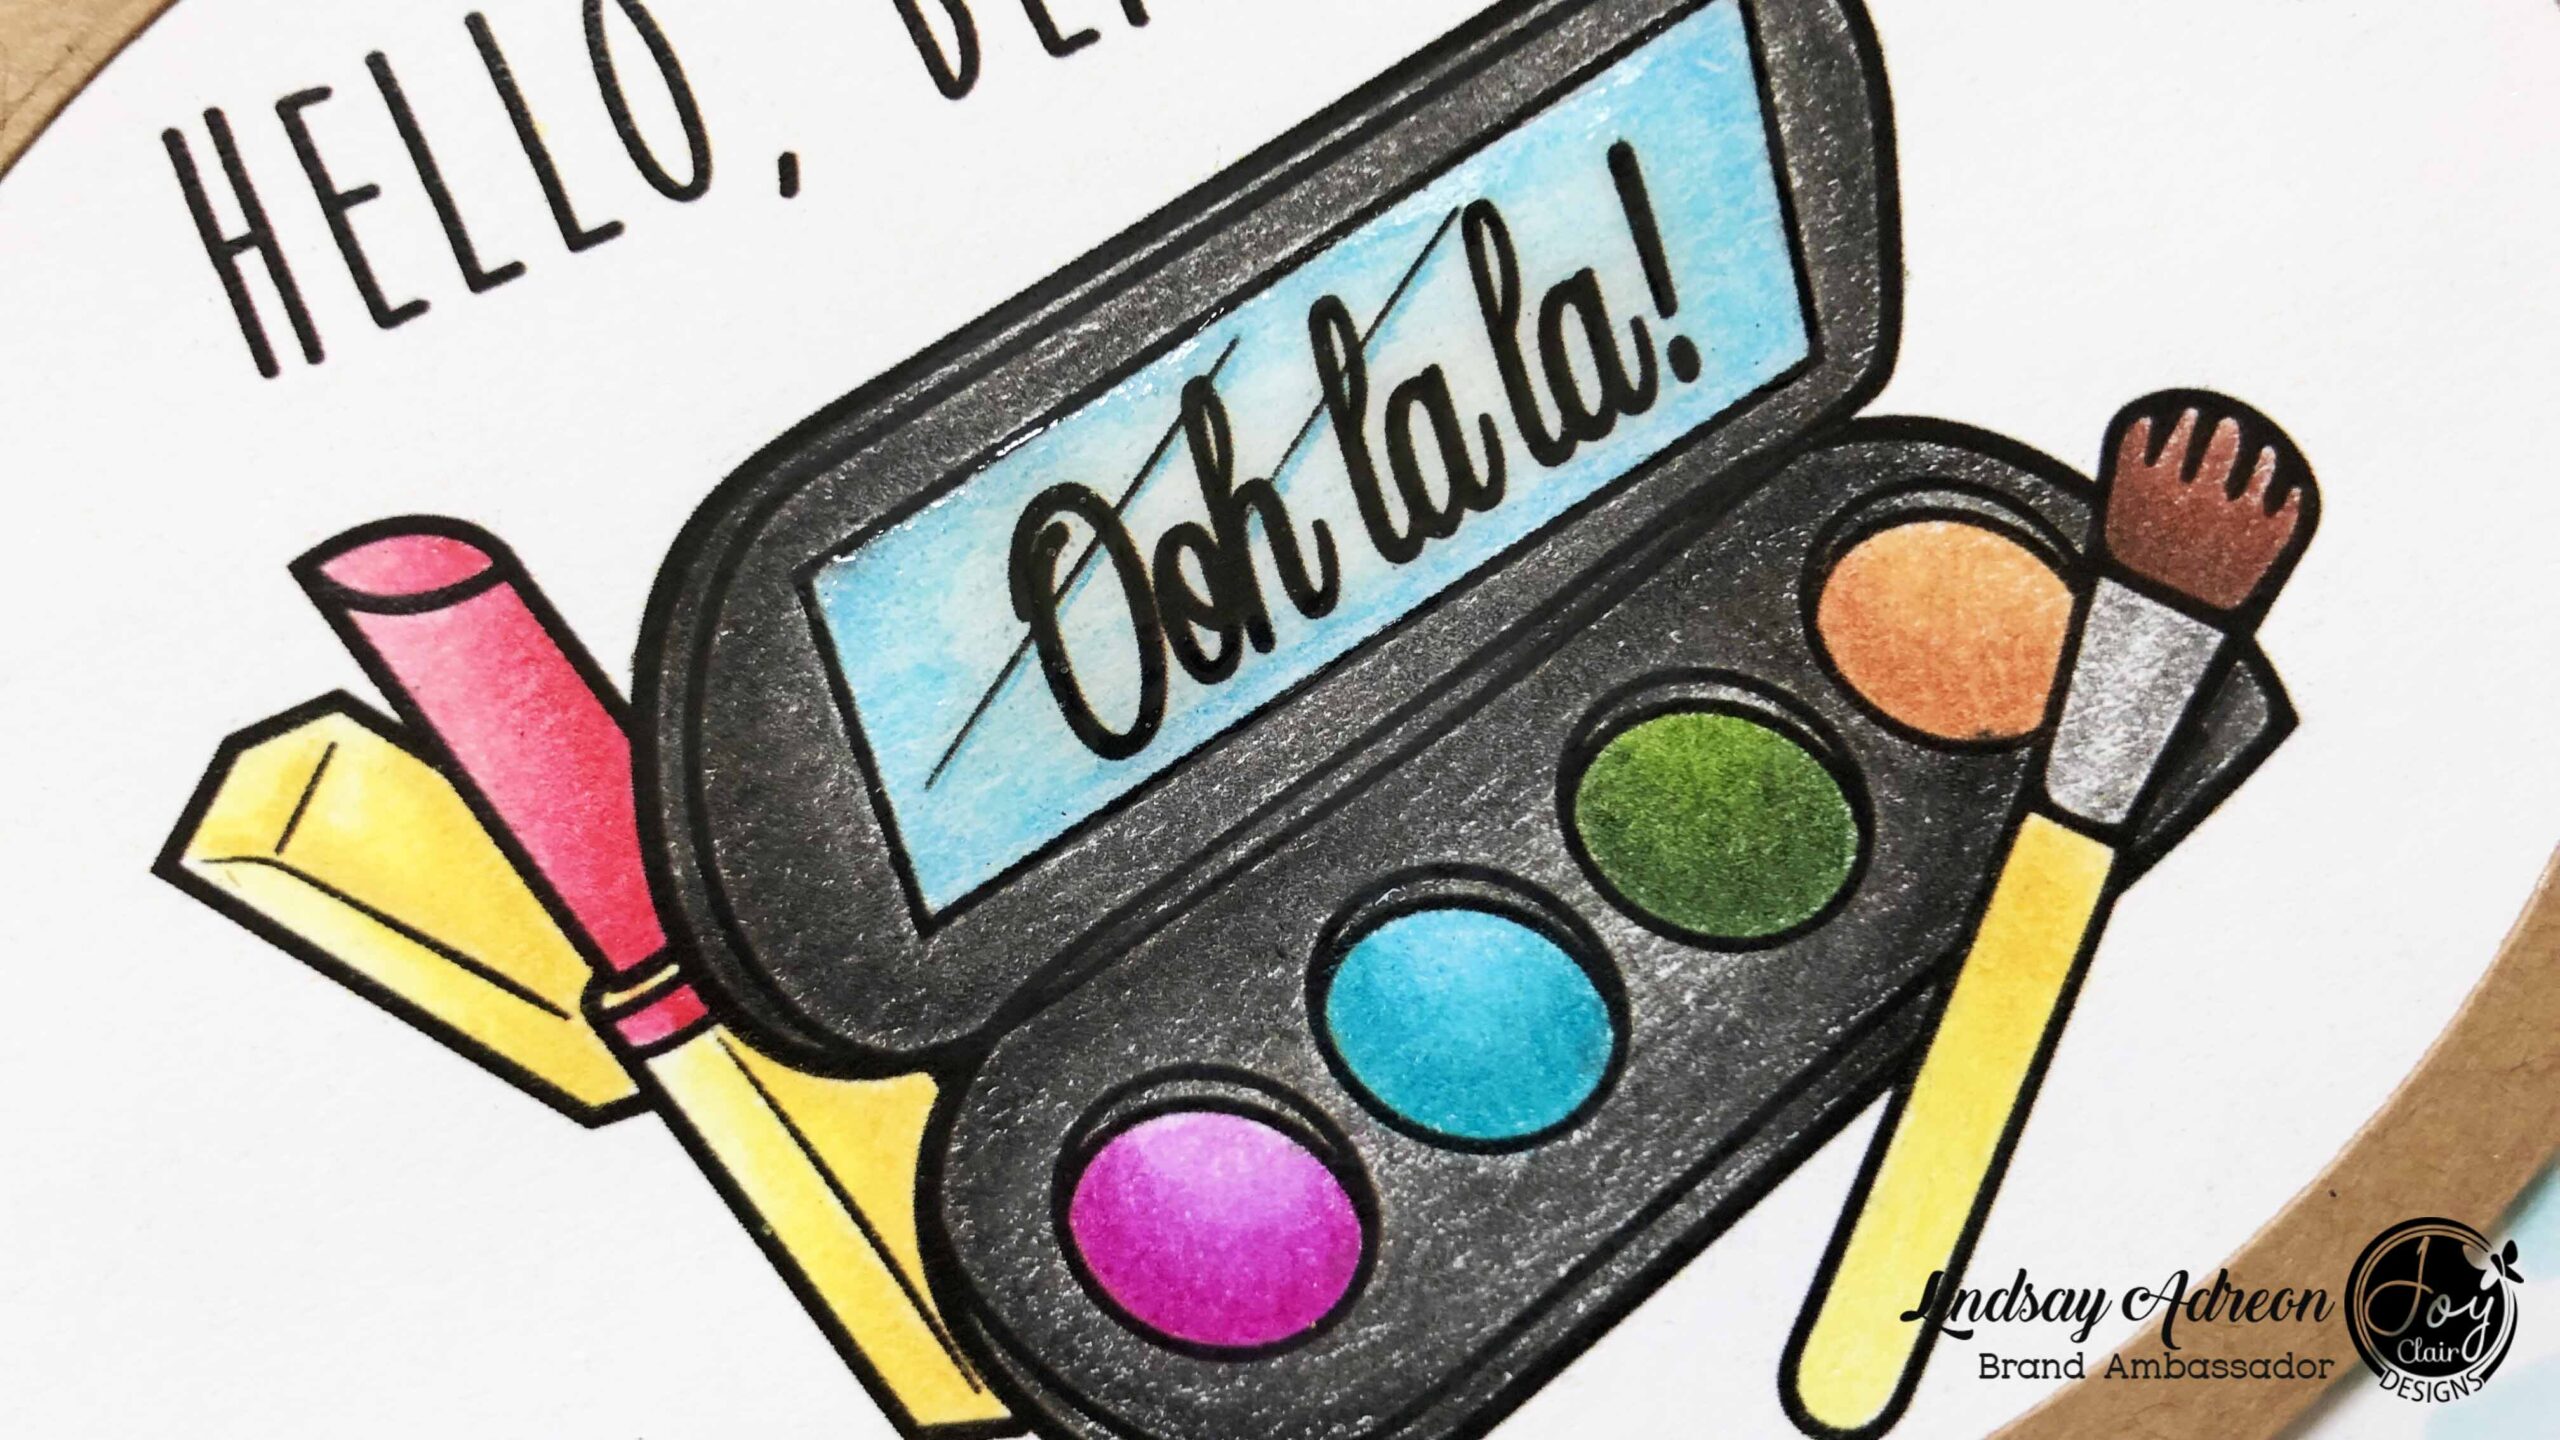
To see how I put together the digital stamps in Photoshop Elements, be sure to watch the video tutorial. It’s much easier to see than explain, I promise! I used the new “Oh La La” digital stamp set to make my card today. But let me pick up here right after the images were printed.

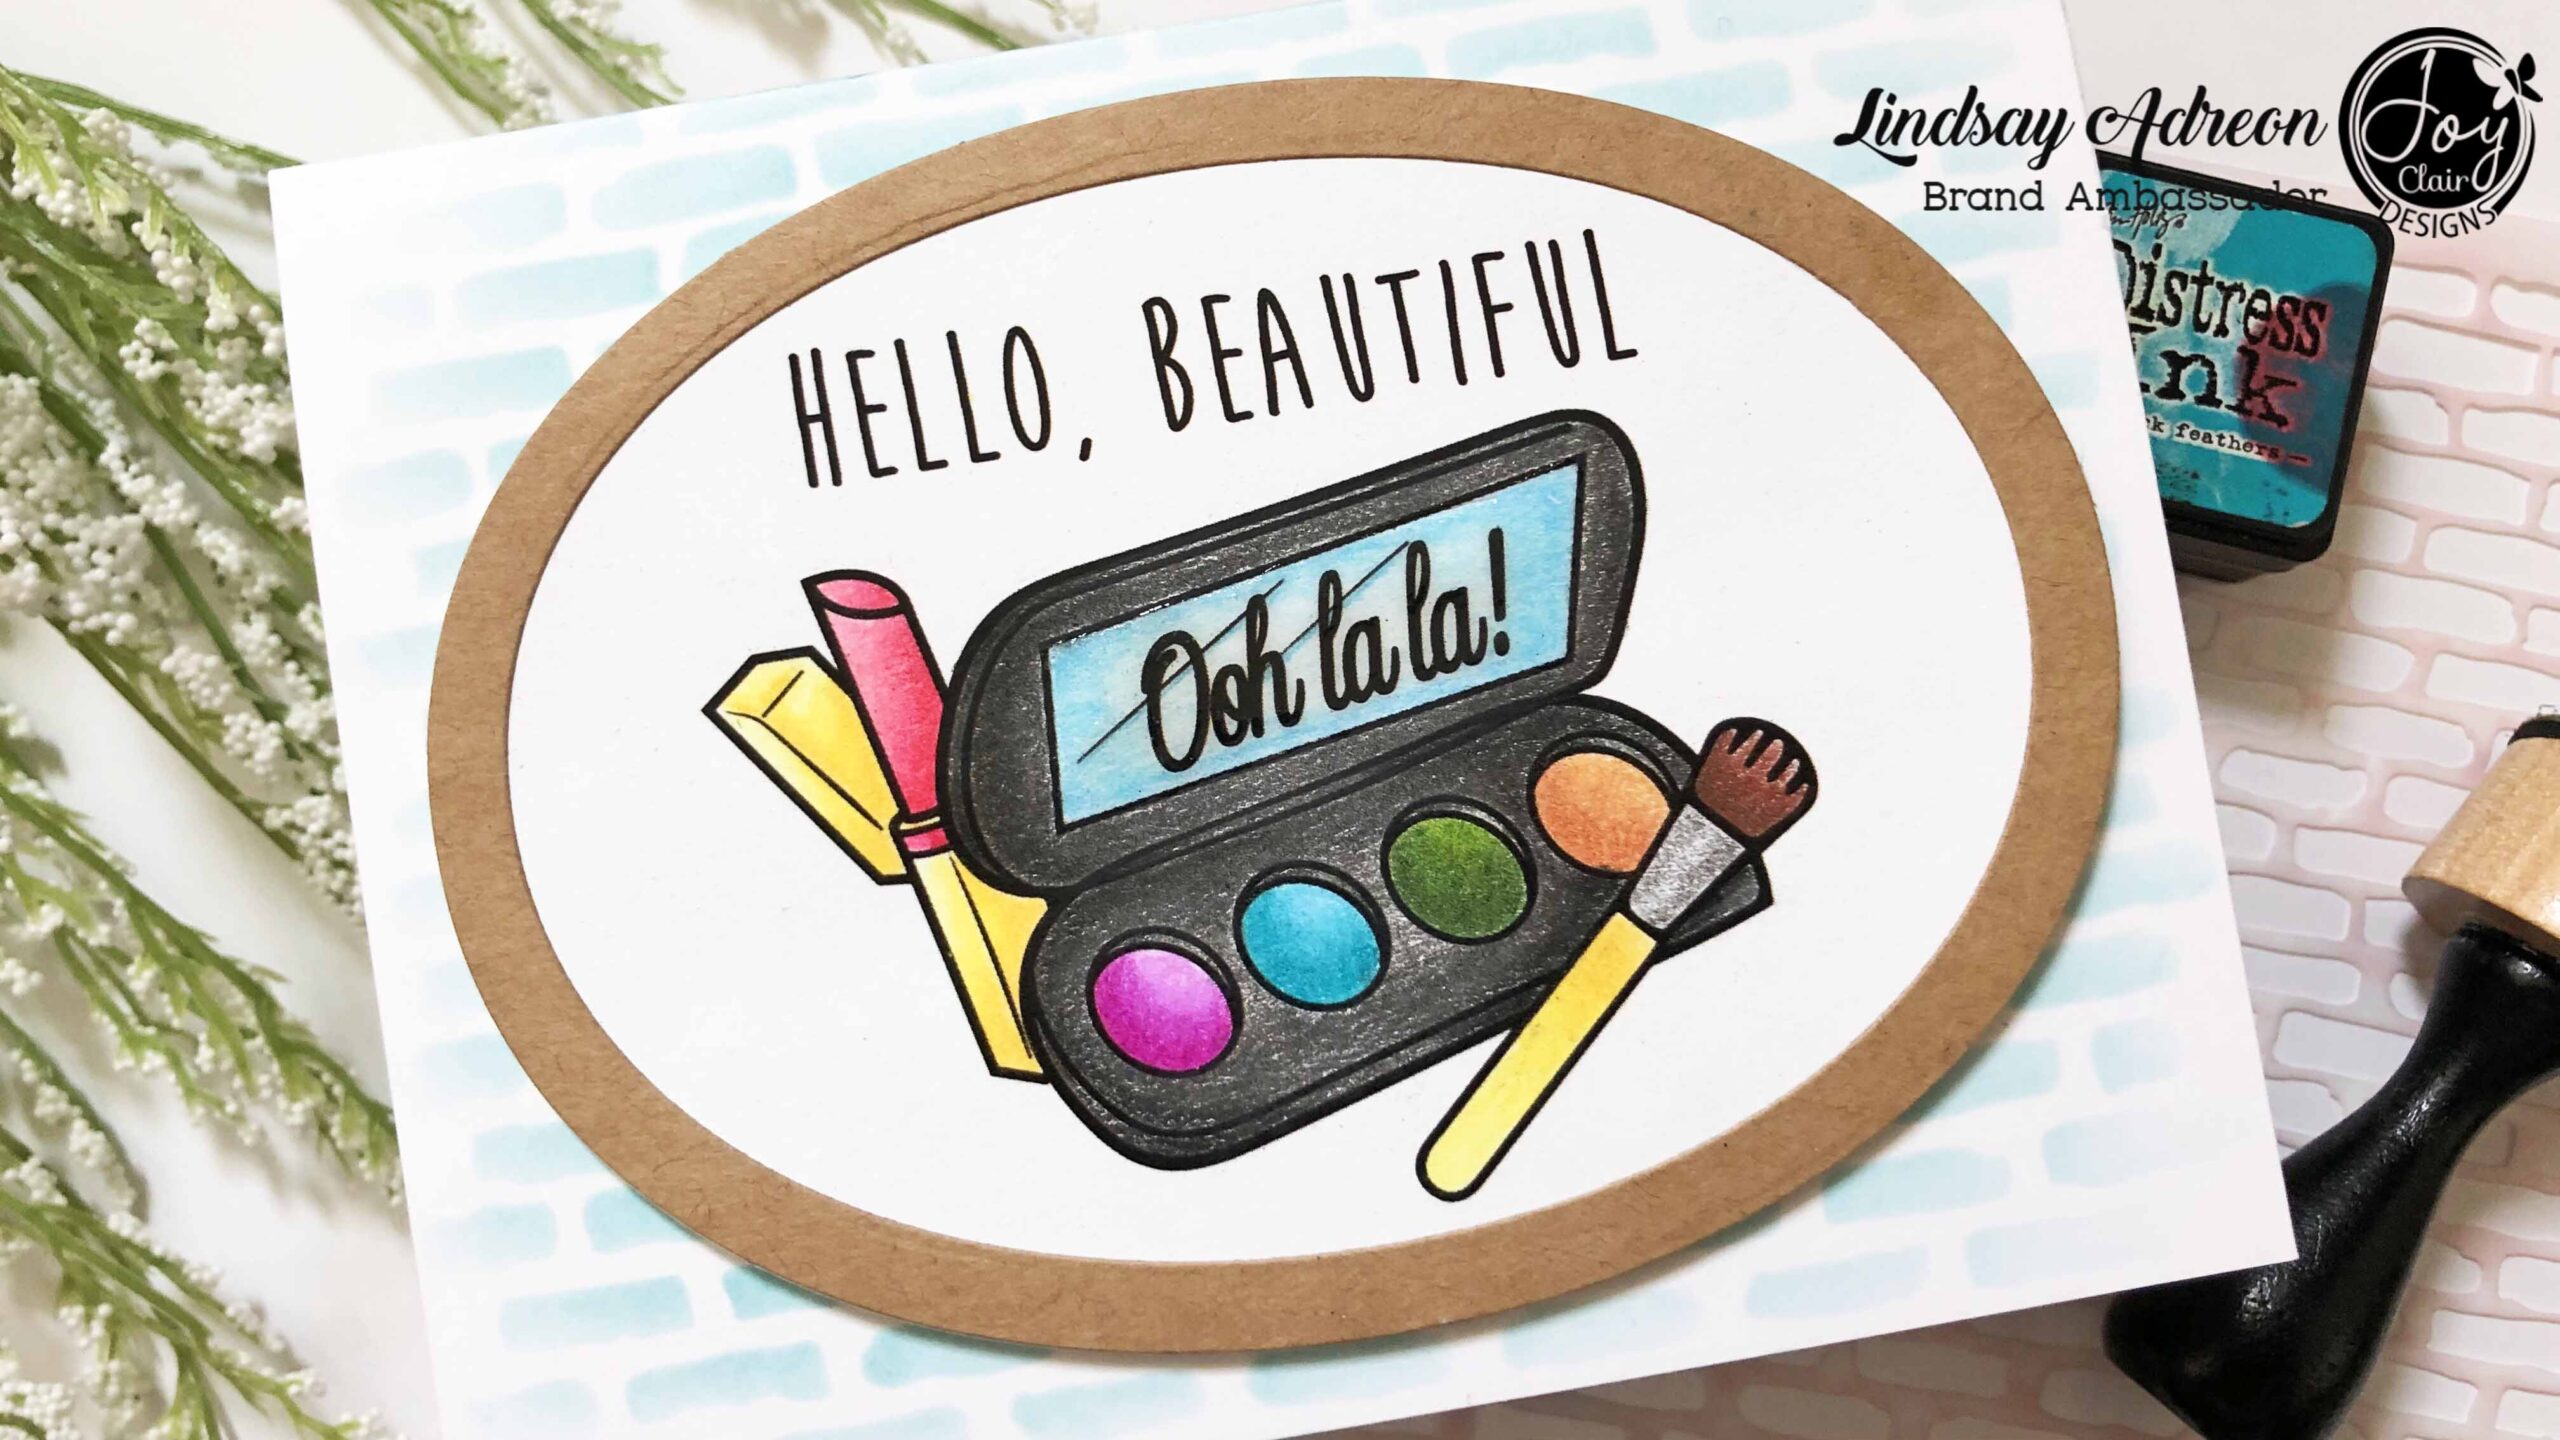
I knew when I laid out these images I wanted to die cut them. So as soon as I printed them, BEFORE COLORING, I die cut the images with an oval die cut. Always die cut before coloring whenever you can. There is nothing worse than putting in the time and effort of coloring a project and then ruining it with a misplaced die. I also die cut a frame for the images as well by using the same die and a size smaller inlaid into the die.
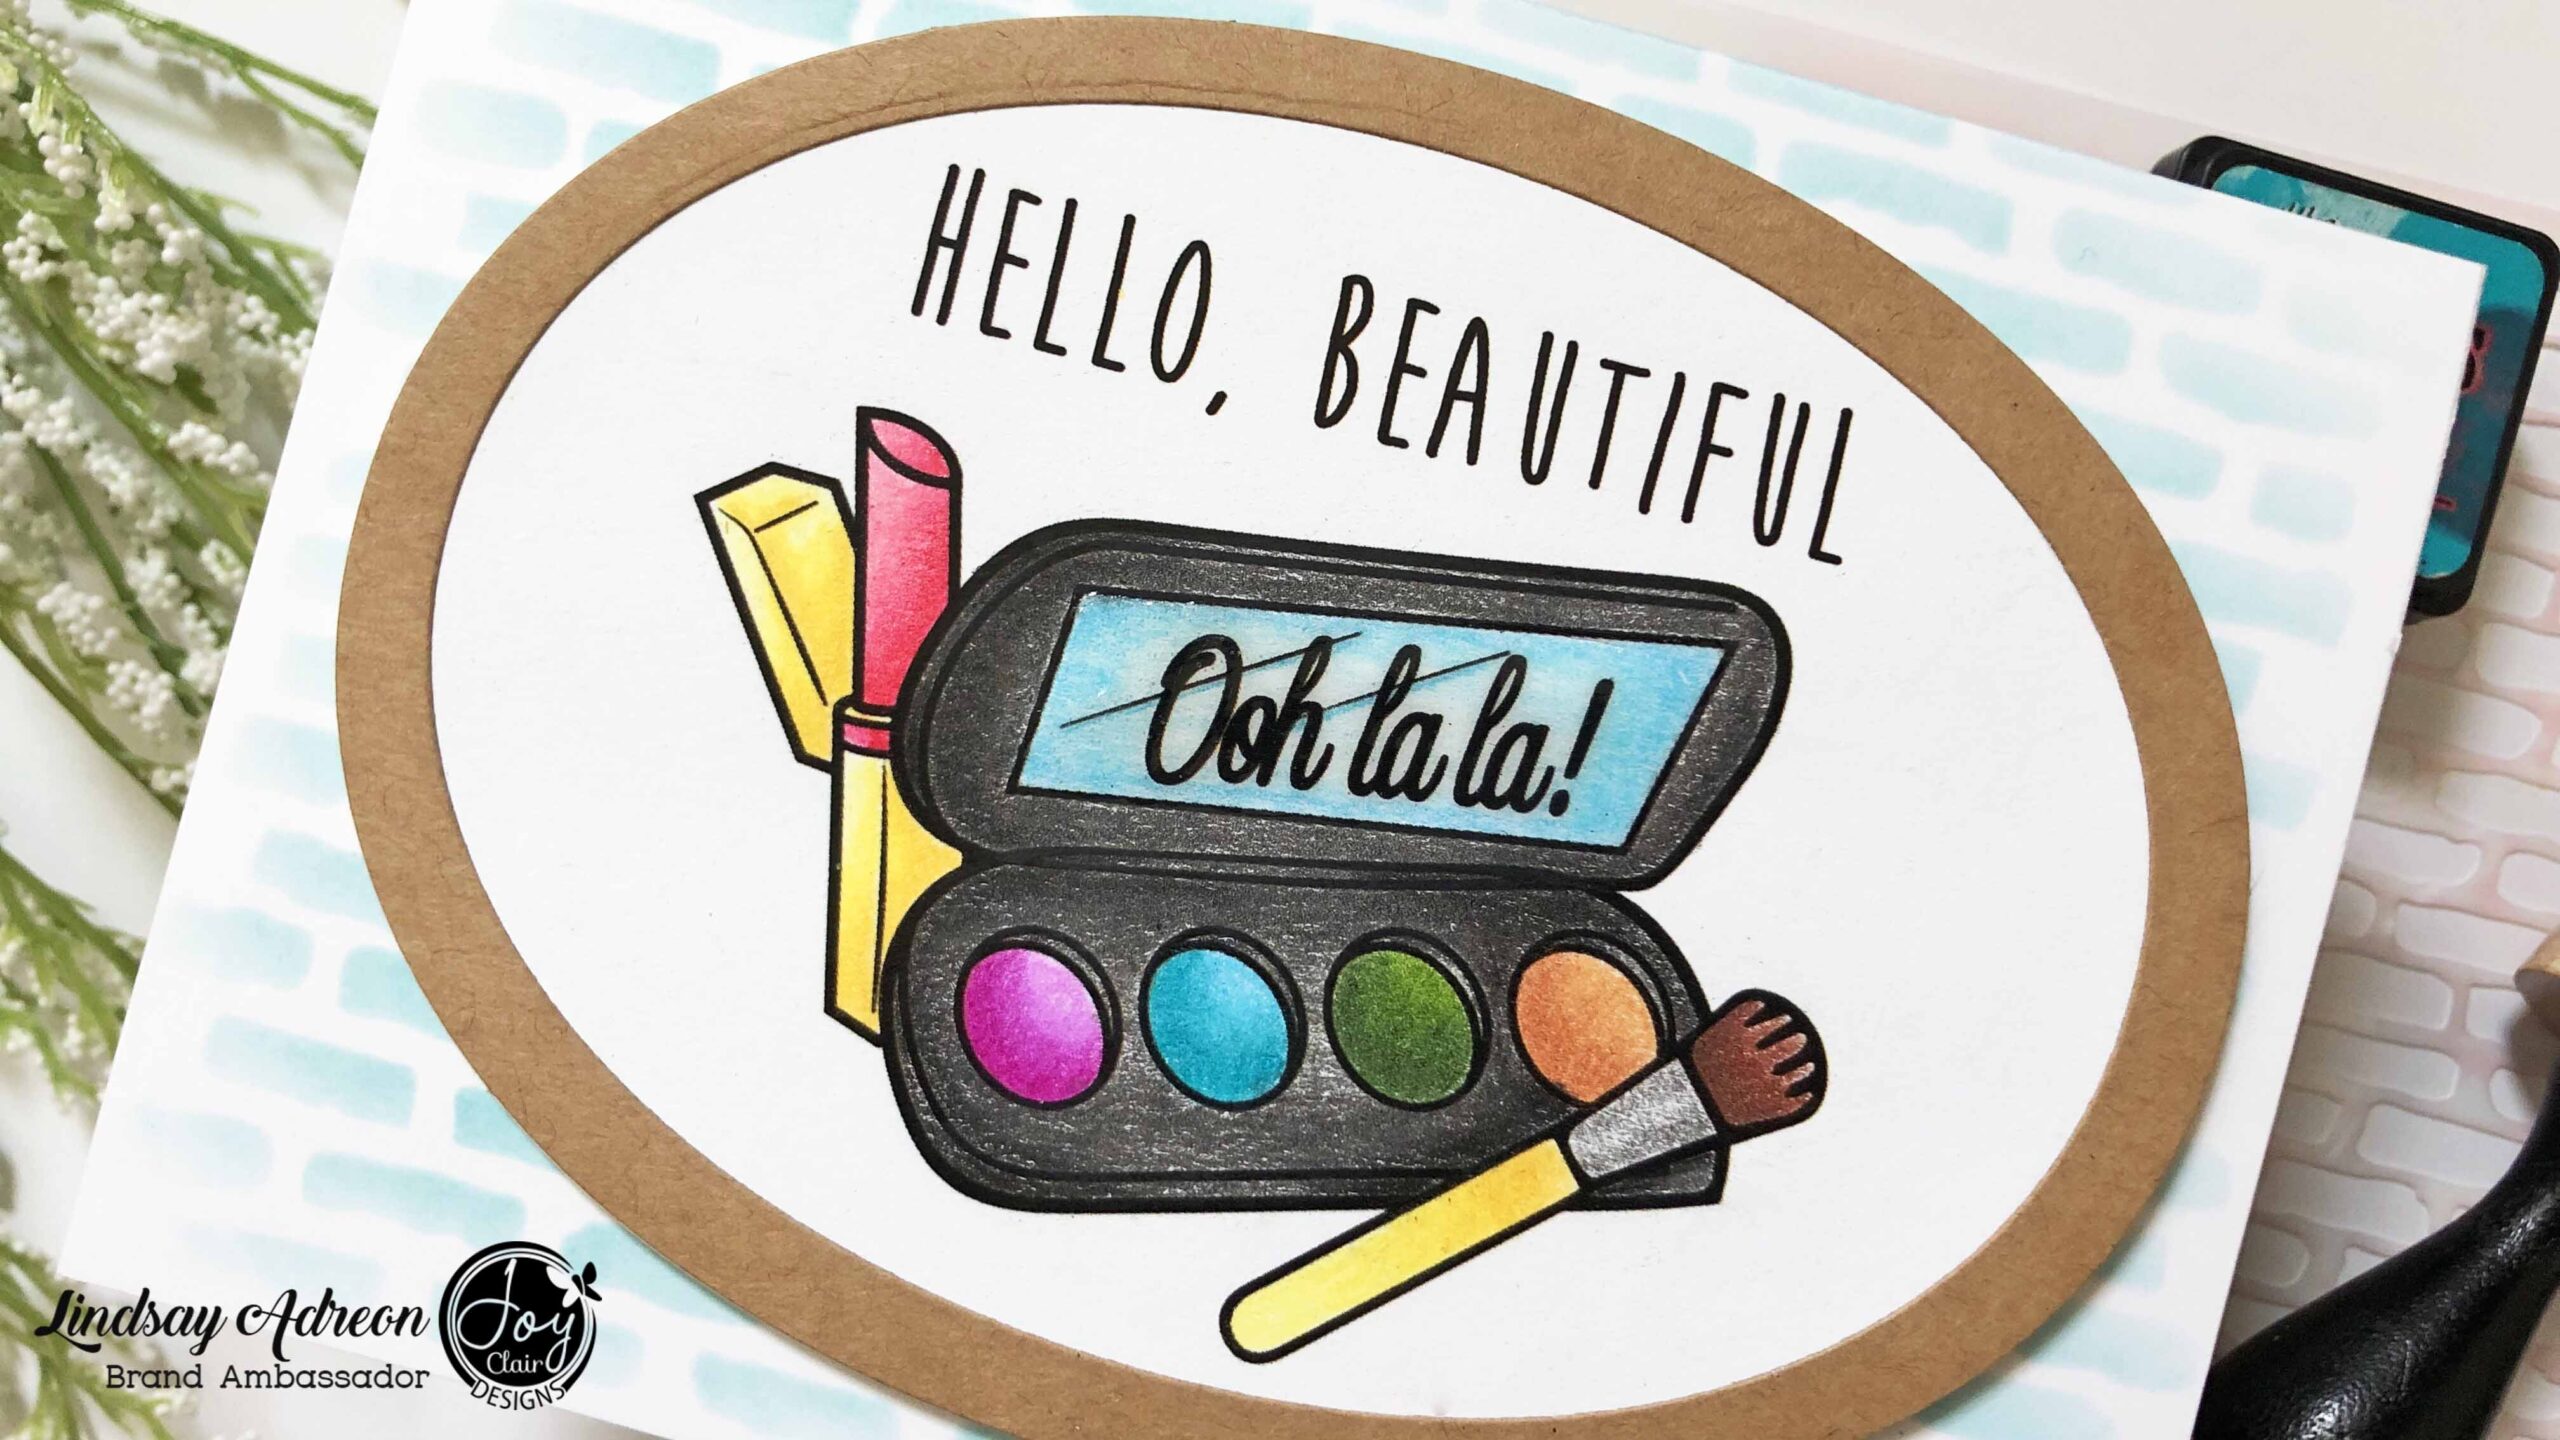
Then, I colored. Really simple coloring here! I used my oil based colored pencils and you can check out the coloring over on Instagram!
Then, I added the frame with a bit of liquid glue and popped up the panel onto an A2 card base with a bit of stenciling on the background.
I hope you all enjoyed a look at how to create this super simple hello card using the new “Oh La La” digital stamp set. If you are interested in the set I used, be sure to click the link below to shop. And also, check out all the digital stamps that Joy Clair is offering!
Until next time, happy crafting!!
Supply List
**Affiliate Links Used**