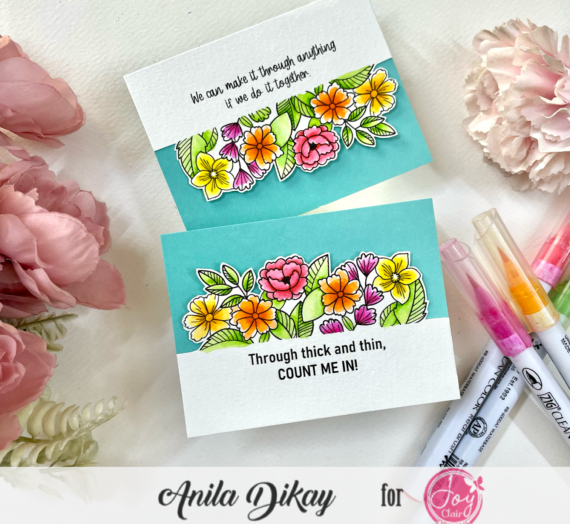
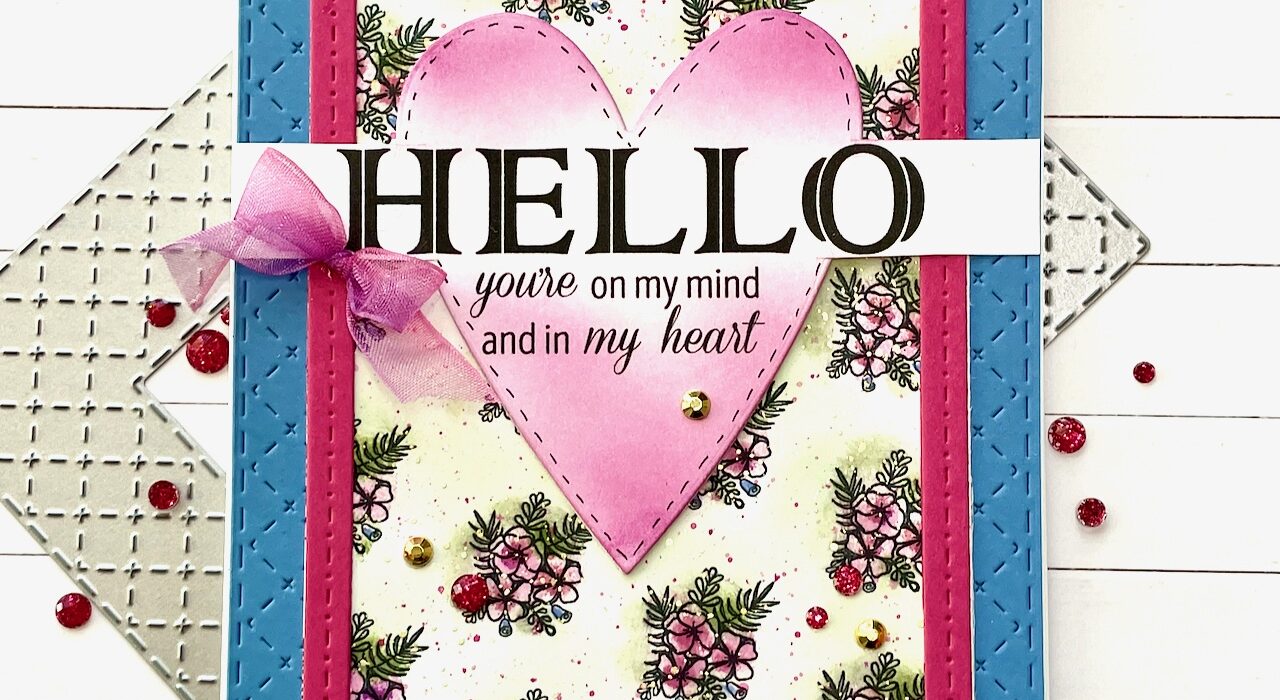
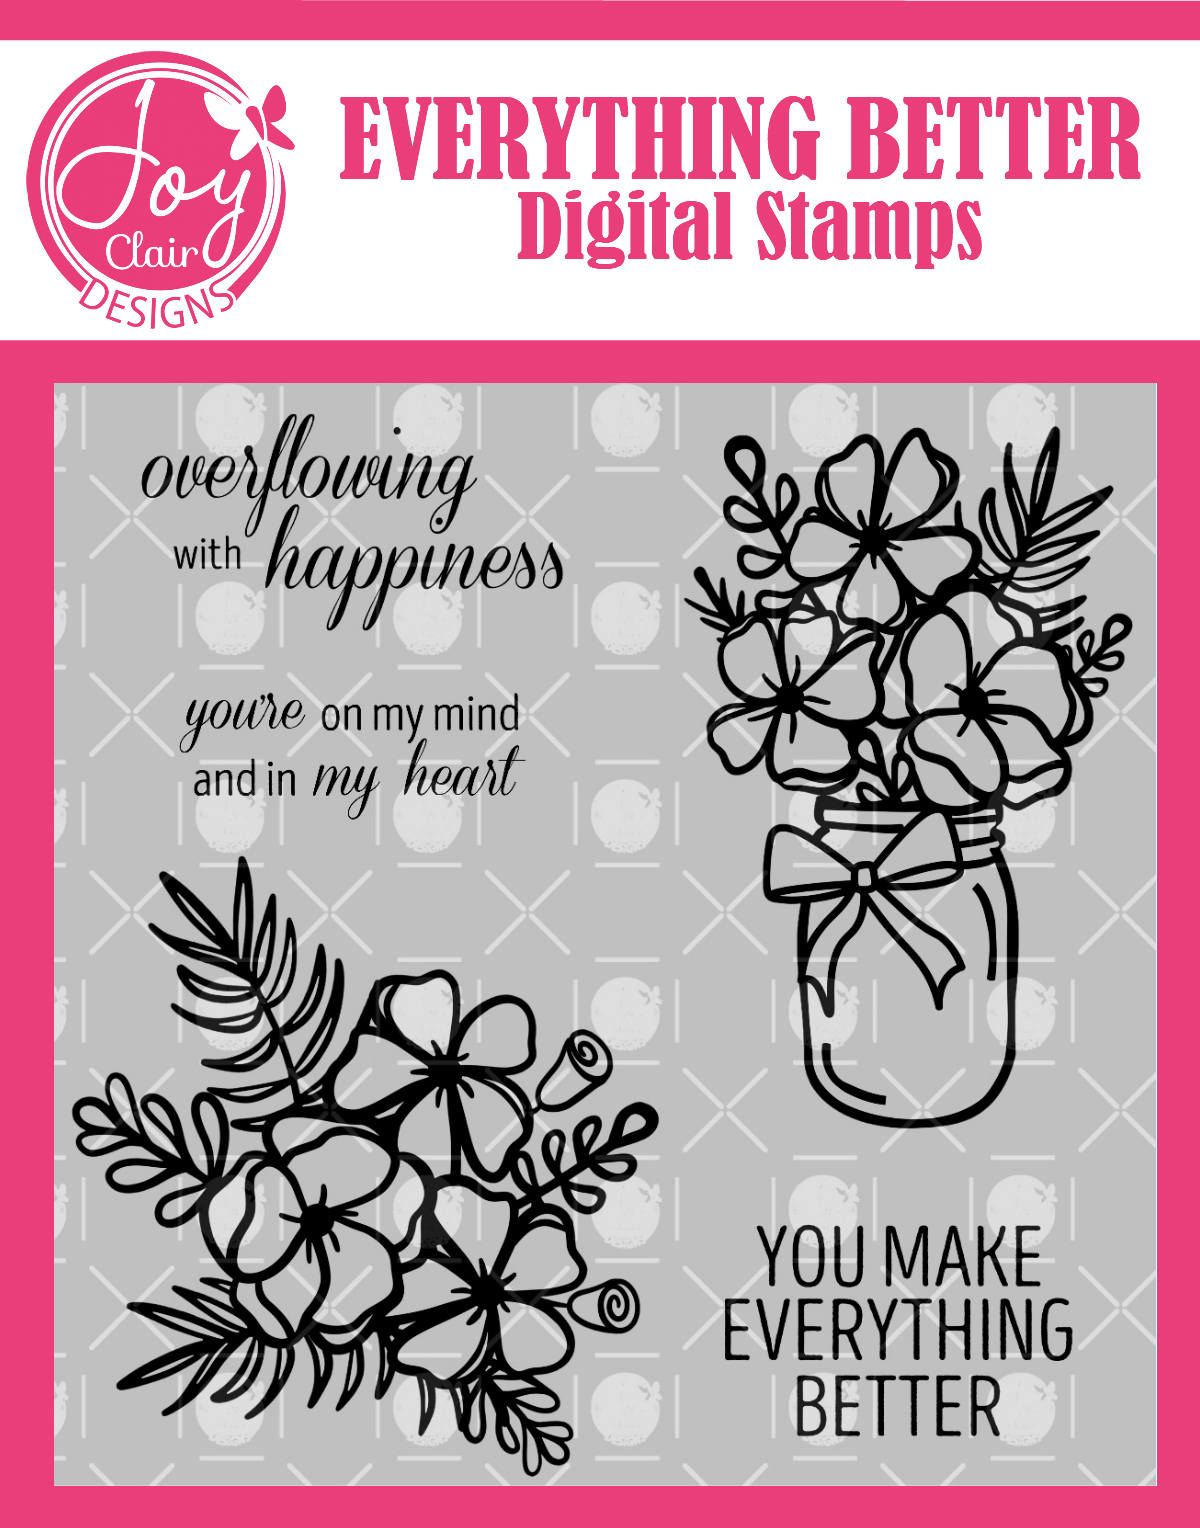
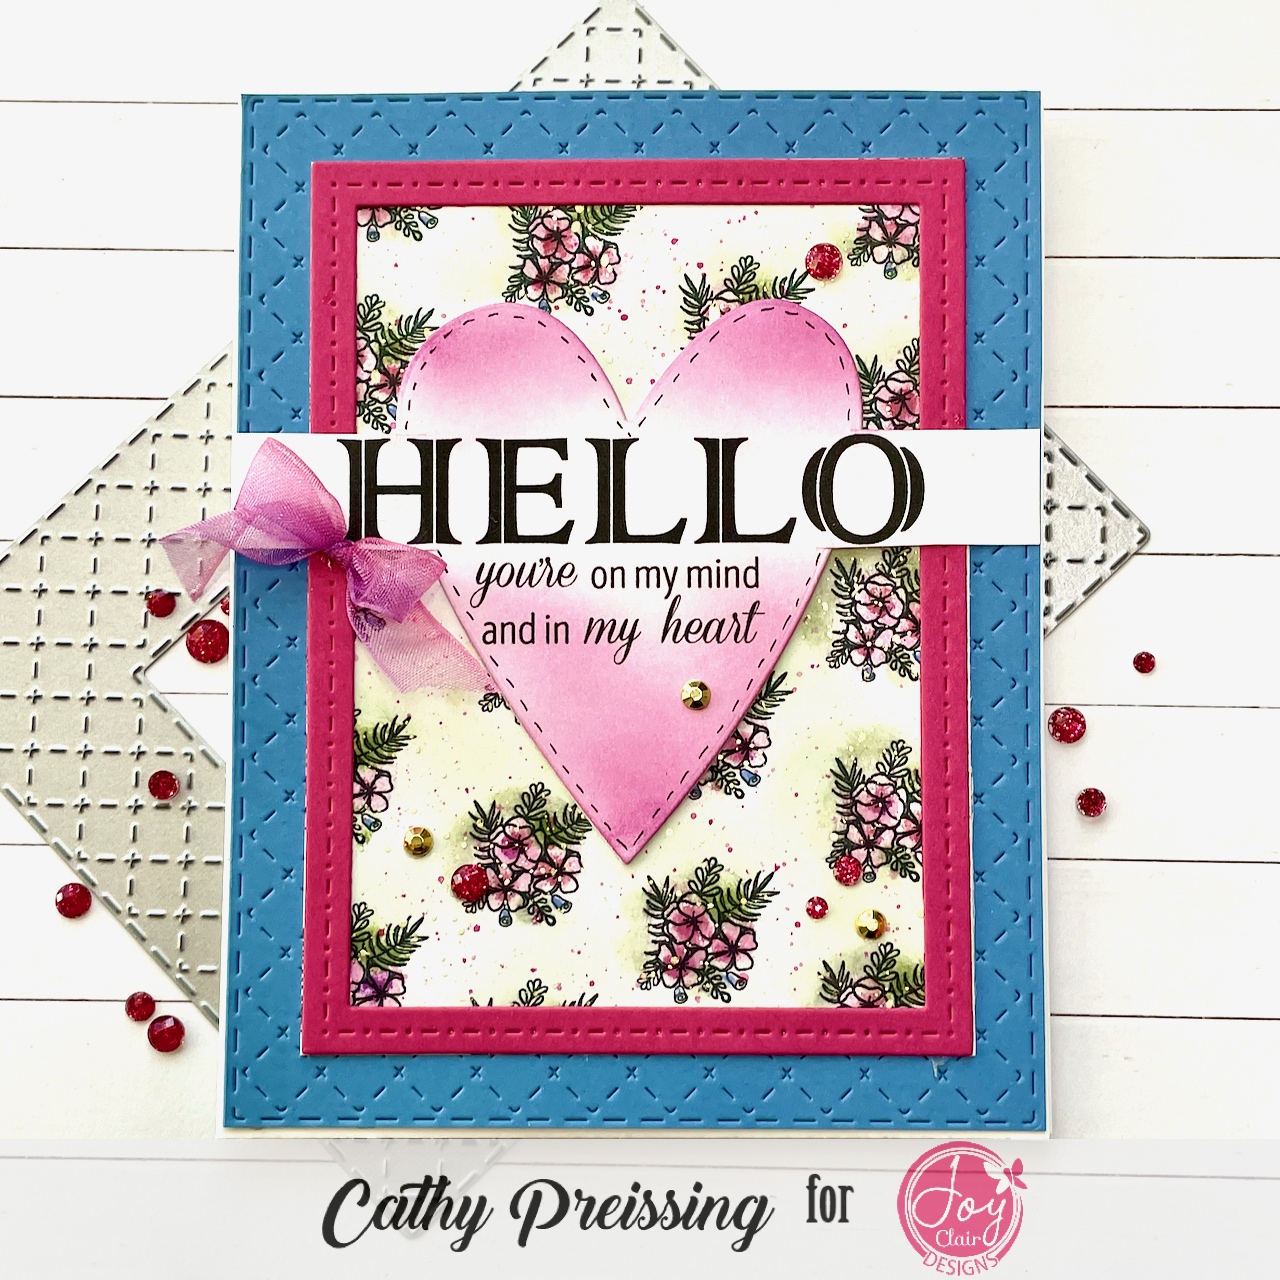
Good Morning, Joy Clair Friends! Cathy on the blog with an idea for creating background paper with your digital stamps. Today’s card features an image and sentiment from Joy Clair’s Everything Better Digital Stamp set along with the word “Hello” from Such A Blessing. First, let’s explore creating an entire background using just the cluster of flowers in the Everything Better set.
Designing the Background Paper:
The process is pretty simple and fun to try, but takes a bit of tinkering and patience! The first step is to import an image into your word processing document. For my card, I chose the cluster of flowers from the stamp set. I reduced the size -each one measures a little less than 3/4″. Next, I duplicated the clusters a few times and then arranged the images in a line.
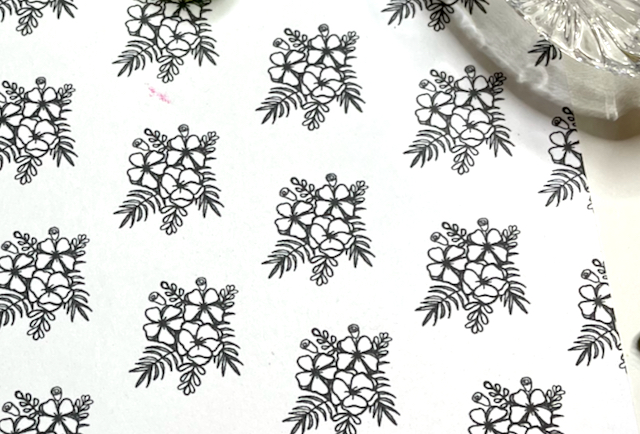
Once I had a line of clusters arranged, I could duplicate the whole line and space them to my liking. Since this is my first attempt at making background paper, I filled in more paper than I needed so I could be flexible when it came to my card design. I also printed more than one sheet so I could experiment with techniques, inks, and colors. I have an inkjet printer, so bleeding was a factor in my technique decisions. In the end, I decided to use ink blending with a small brush. It allowed me the most control with ink application. My other objective was to not spend a lot of time making the background paper. Once I got started, the process was finished in less than 30 minutes.
Adding Color and Details to the Background Paper:
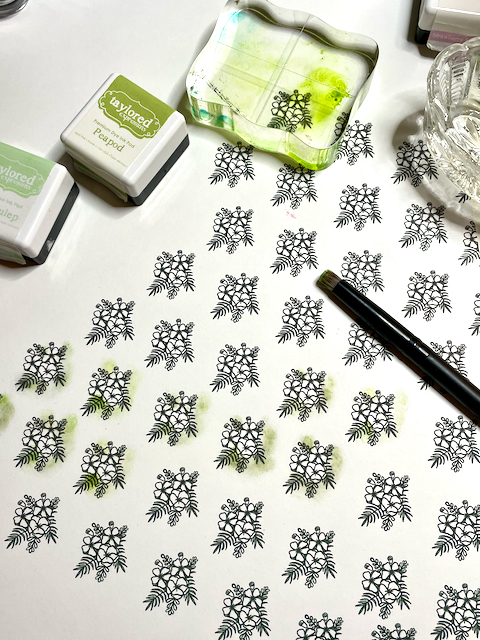
Starting with my green inks, I smooshed them onto a clear block, picked up the ink from the block, and blended around the leaf portion of the flowers. I could color around 10 flowers with one brush-load of ink.
Next, came the pink flowers. This was a two step process. Using the same idea of smooshing ink onto a block, I picked up the pink and stippled it onto the flowers. Again, with a brush-load of ink, this went quickly.
For the next step, I wanted to add contrast and depth to the flower centers. I got my brush slightly damp before I pick up a darker pink off of the acrylic block and plopped it into the center of each flower. 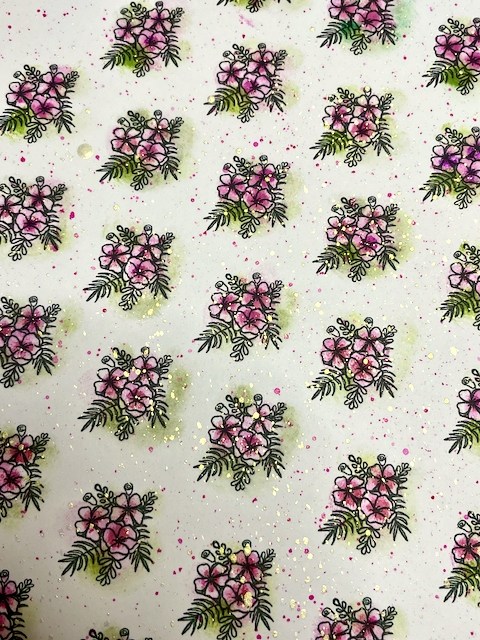
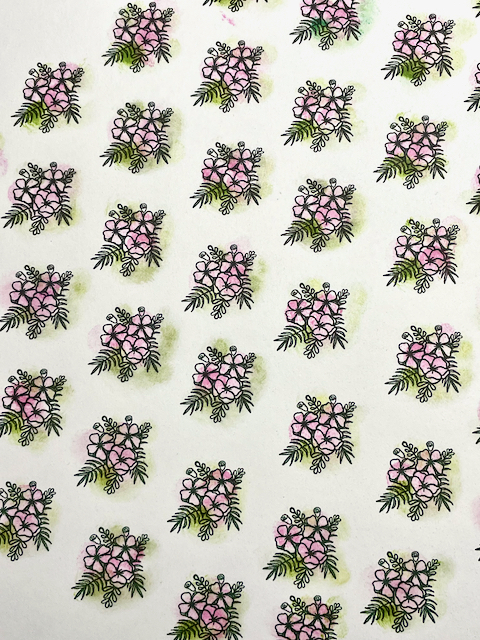
To give detail to my background, I watered down Pickled Raspberry Distress Stain and splattered it on the paper. I added the gold (and white) splatters by watering down Creative Expressions Enchanted Gold Gilded Touch. Finally, I colored the bitty buds with a Prismacolor Blue Violet Lake colored pencil. The overall look has a watercolored feel to it, which is what I was going after.
Card Design:
Once I finished creating my background paper, it was time to put the card together. I combined the “hello” sentiment from Such A Blessing with “you’re on my mind and in my heart” from Everything Better. Since working with digital stamps, it was easy to size and space them so they fit inside of a heart die from my stash. After die cutting the heart, I inked the edges and doodled the stitched look around the heart.
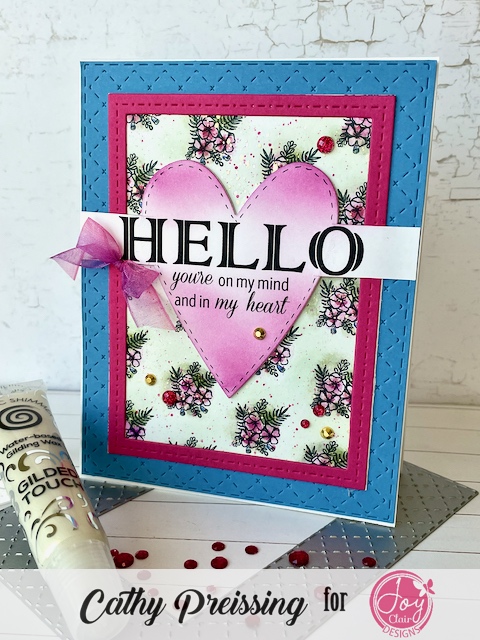
Next, I looked for ways to feature my fun background paper on the card and settled on using a stitched frame die in dark pink. Choosing a blue card base tied in with the tiny blue flowers I colored. It also helped the card from becoming monochromatic.
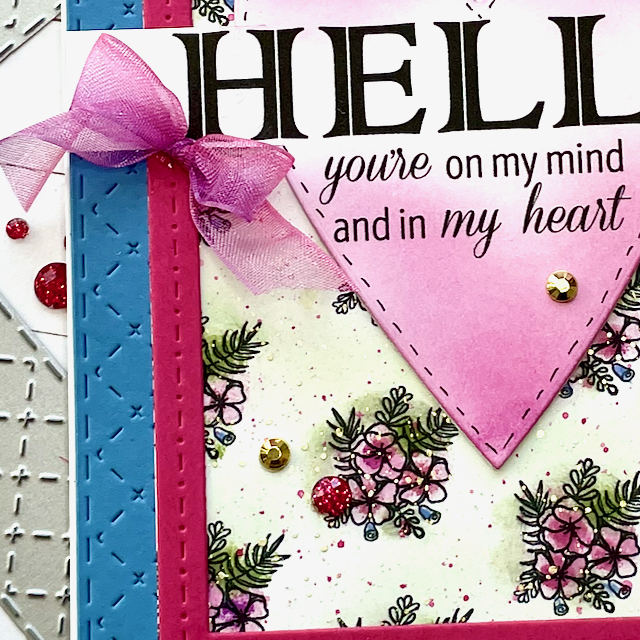
Finally, I added a bow and clusters of embellishments. This card would be appropriate for Valentine’s Day or a “thinking of you” occasion. I love looking for ways to use my digital stamps and hope you are inspired to try using digital stamps to create a background of your own. Thanks for stopping by the blog! ~Cathy
Follow us!
Please sign up for Joy Clair Designs newsletters. Subscribers receive notifications of new releases, sales and exclusive offers. You can also follow the team’s Joy Clair Designs creations on Facebook Page, Joy Clair Stamp Projects Facebook Group, Instagram , Twitter, Pinterest and YouTube!