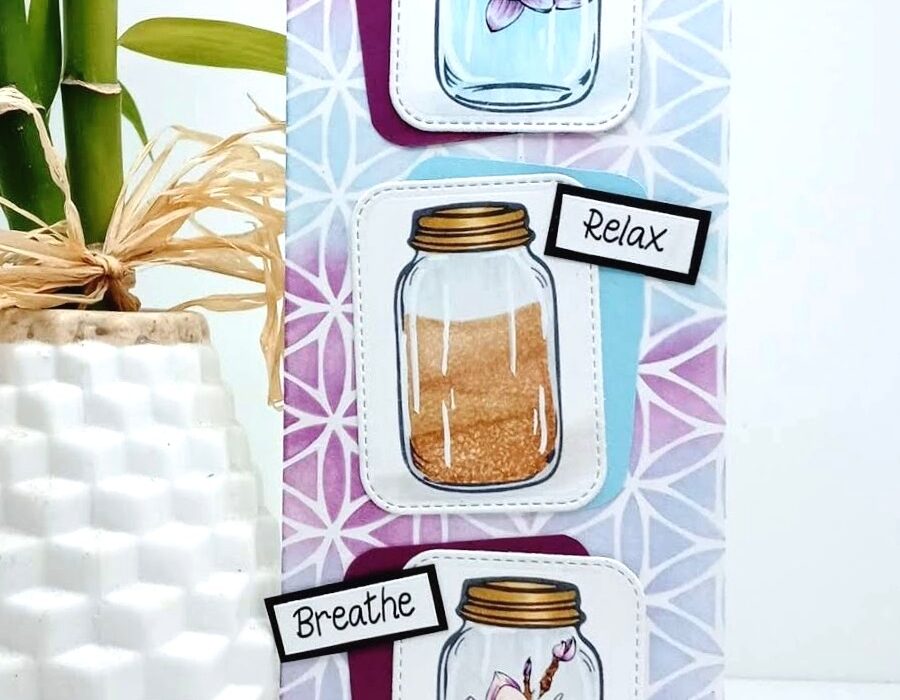
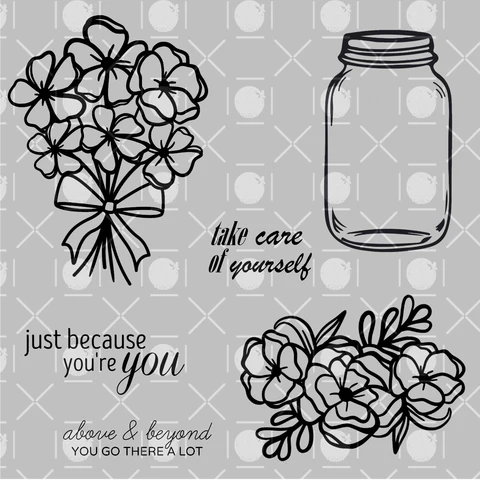
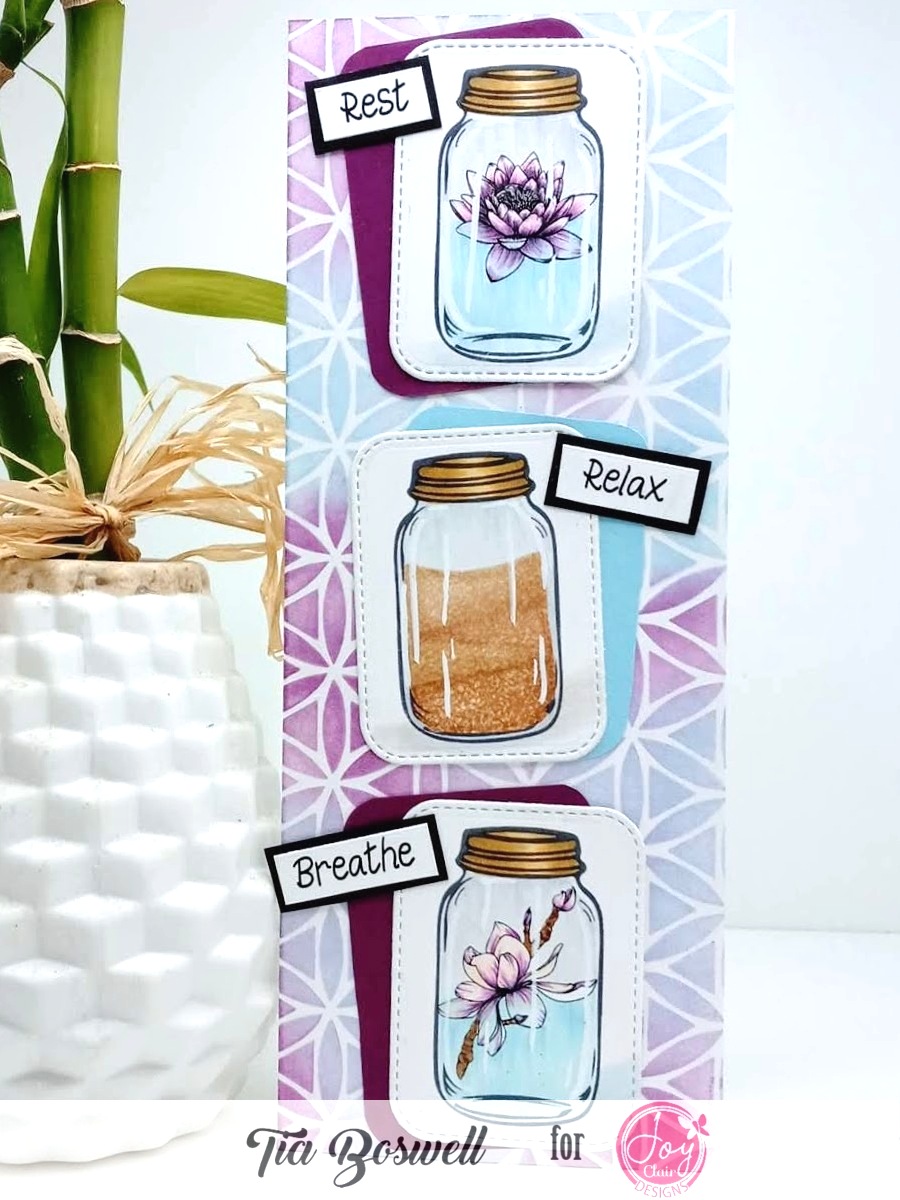
Hi Friends! Tia here from RockyMtnCraftia.com. I’m back with more ideas using the Mason Jar from the ‘Above and Beyond’ digital set from Joy Clair Designs.
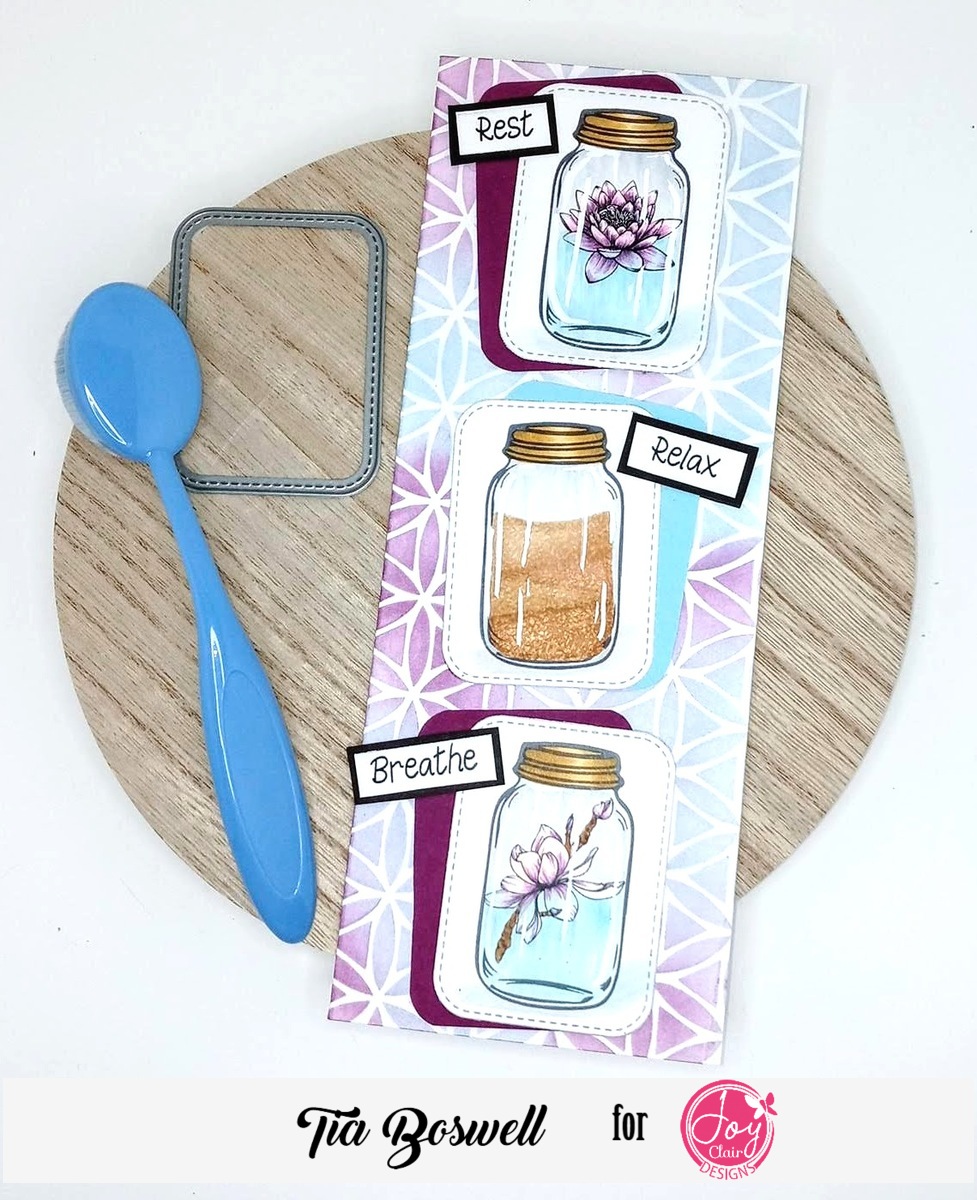
I just returned from a craft retreat and one of the lessons we worked on was a glass jar! So I was excited to get home and practice the Mason Jar I know and love!
I loved the sentiment ‘take care of yourself’, because it’s something I think we all need to be reminded of! Flipping through the Joy Clair catalog it was the single Magnolia bloom that made me think of floating it in the jar. Then the Lotus branch! I opted to break up the flowers with a loved Mason Jar of beach sand. Plus it let me use another Copic technique! So let me share what I learned!
Sand Technique
I selected several sand shade colored Copics. Starting from darkest to lightest I layered them at angles in the Mason Jar. Using a cut piece from a washcloth, I moistened it with 91% Rubbing Alcohol (or colorless blender-alcohol is cheaper!). Wrapping the cloth around my finger I pressed it to the “sand” for a quick count of 3 seconds. Practice this BEFORE trying on a piece you’ve colored! If the cloth is over saturated it will blur the spots and look more like mud.
Sand Copic Colors: E35; E55; E33; E31

Florals are from the ‘First of All’ digital stamp set.
Water Technique
I used my computer software (Pixlr) to minimize the flowers and place them into the Mason Jars. I imagined a halfway point that the jars would be filled with water. Beginning under those leaves I used ‘tip to tip’ to draw ink from my darker blue Copic with the lighter blue-green. I used medium sized downward flicks and let them end at various lengths. I went back with the lighter BG Copic from the bottom to fill in the jar. In reality-both flowers would have some petals under water, so I made sure to color over several petals with the BG Copic.
Water Copic Colors: BG0000; B000; B91
Glass Jar Technique
In order to see the ‘shine’ on the jar better, I used C1 & C0 to fill the jars above the water/sand lines. With a sized 00 paint-brush, I dipped the wet bristles into a jar of Dr. Ph. Martin’s Bleed Proof White. (Found at Michael’s/Office Depot/Amazon) It’s a lot like whiteout without the applicator. If your jar appears like cement, don’t fret! Wipe your wet brush over it and it will still pick up the ink. Pick various locations/lengths/widths to draw out your ‘shine’. If your lines are too dark they can be thinned out with another overlay of water and vice-versa.
Finishing Touches
I stenciled my background using distress ink in ‘Seedless Preserves’ and ‘Tumbled Glass’. I used the die to cut around my solid cardstock so it would be slightly larger.
Magnolia Copics: R00; RV02; V05
Lotus Flower Copics: RV02; V04; V06
Mason Jar Copics: Y28; Y26; Y19; Y21
Thanks for taking some time to follow along with me.
I hope you have the opportunity to try some of these awesome techniques!
If you do, make sure you share it with us over on the Joy Clair Facebook Group Page at: https://www.facebook.com/groups/JoyClairStampProjects
Until next time-Get Crafty!
-Tia
P.S.-I’ve got more ideas that I’d love to share with you. Come follow me over at my Website, Instagram and Facebook.
Follow us!
Be sure to sign up for Joy Clair Designs newsletters. You will receive notifications of new releases, sales and exclusive offers for subscribers. You can also follow the team’s Joy Clair Designs creations on Facebook Page, Joy Clair Stamp Projects Facebook Group, Instagram , Twitter, Pinterest and YouTube!