Skip to content 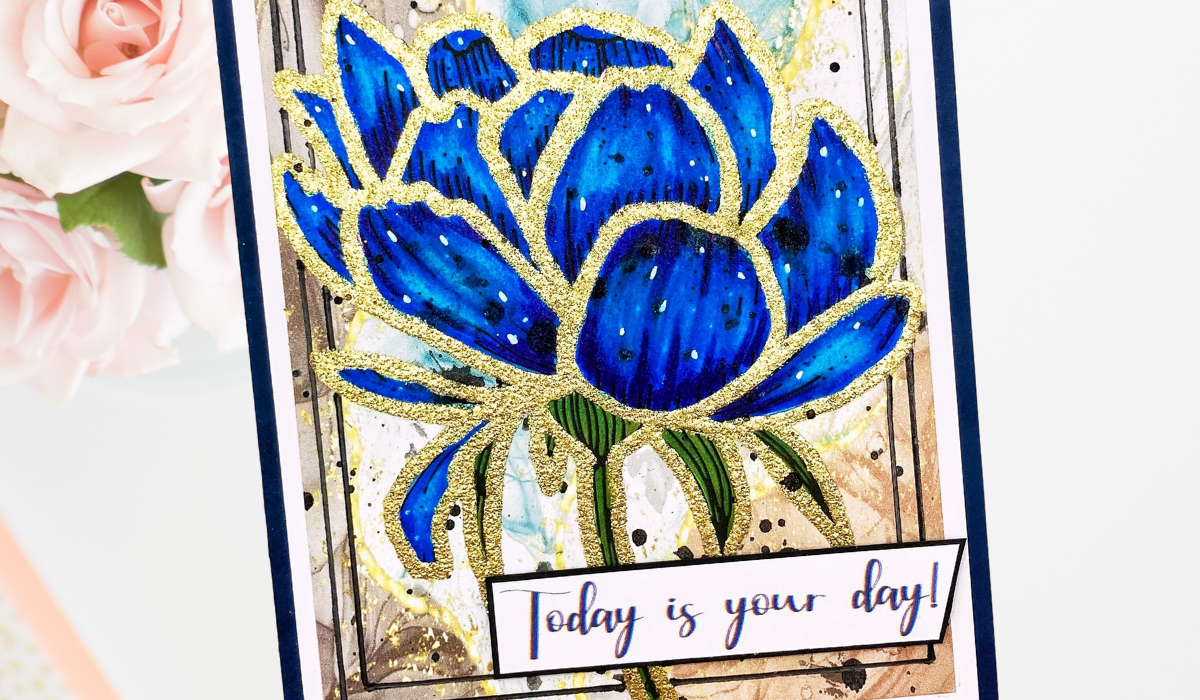
Today is Your Day!
Today is your day friends! Was there a time that you said that to yourself? I certainly do and I hope you do too! Marj here from MarjBanzalesDesigns and I am glad you are here today.
Have you tried embossing your digital stamp? Today is your day as my project is all about that plus there’s a bonus.
So, without any further ado, let’s get started!
First of all, I will tell you about the bonus. Some of us really struggle when it comes to using alcohol inks and making a nice background out of it. Sometimes we used it to create a pattern or even an image out of it. Well, today is your day! I have a surprise for you.
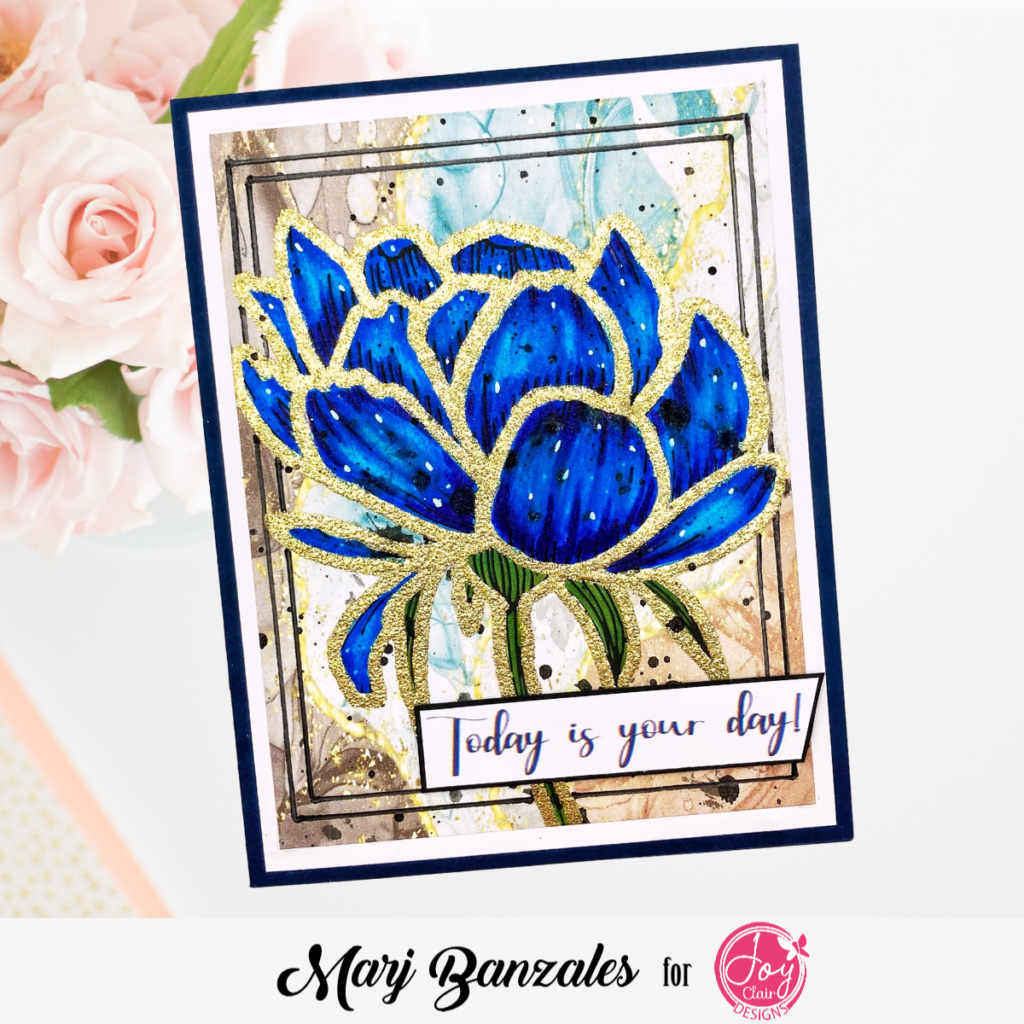
Digital images are in and as well as using digital paper. It is my go-to background and it’s a lifesaver. I have a few alcohol inks and I’m a fan but using them without an open window is not fun. So, I found an alternative, a digital alcohol ink paper.
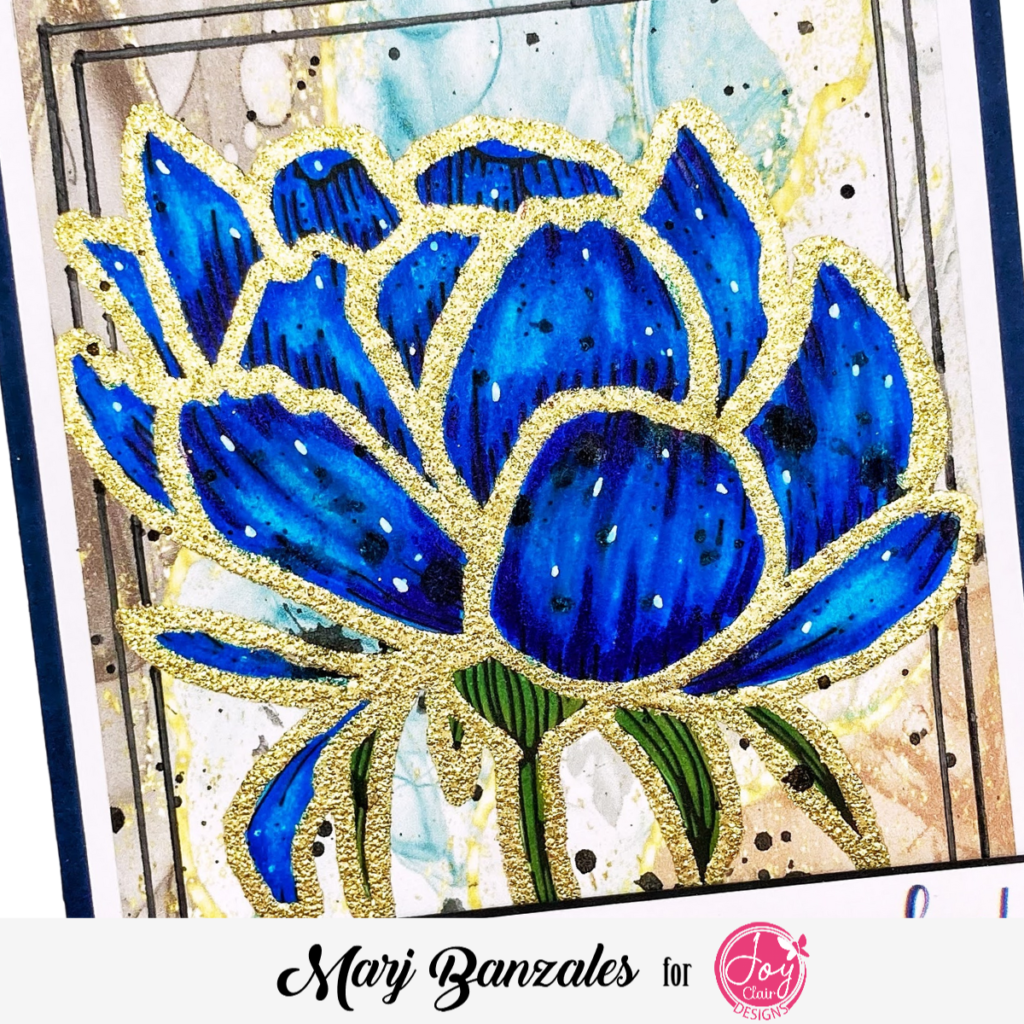
To start with, I chose my background and set it to 3.75 x 5 inches. Next, I added the beautiful Spring Rose Digital Stamp Set on top and center. I manage to set the size of the Spring Rose Digital image as a focal point of my project. Once settled, I printed it onto Sweet Tooth White Cardstock. Using my all time favorite alcohol markers none other than Arteza and used the Blue color family.
Arteza Colors: A8270 (Mykonos Blue), A8269 (Light Navy Blue), A8274 (Sapphire Blue), BG19 (Pale Aqua Blue), and BG29 (Pale Turqouise)

I’m happy how it turned out and you can’t even tell that you did not really make the alcohol ink background as it looks exactly the same as when you make them.
After coloring the beautiful rose stamp, I apply embossing ink to the image and then heat embossed with Wow Gold Embossing Powder. To make it pop, I embossed it twice and absolutely love how it turned out!
I added some black paint splatter for some added interest.
To finish it off, I added it to white cardstock as my first layer then adhered it to an A2 white notecard.
I really love how this turned out and will do this again for future projects.
If you like this project, please leave a comment on the blog post. Don’t forget to stop by Joy Clair Designs.
Thank you all for stopping by and I will see you next year for some more amazing projects. For some more inspiration, please visit my Website, Instagram, Facebook, Pinterest, and Youtube Channel.
Marj