
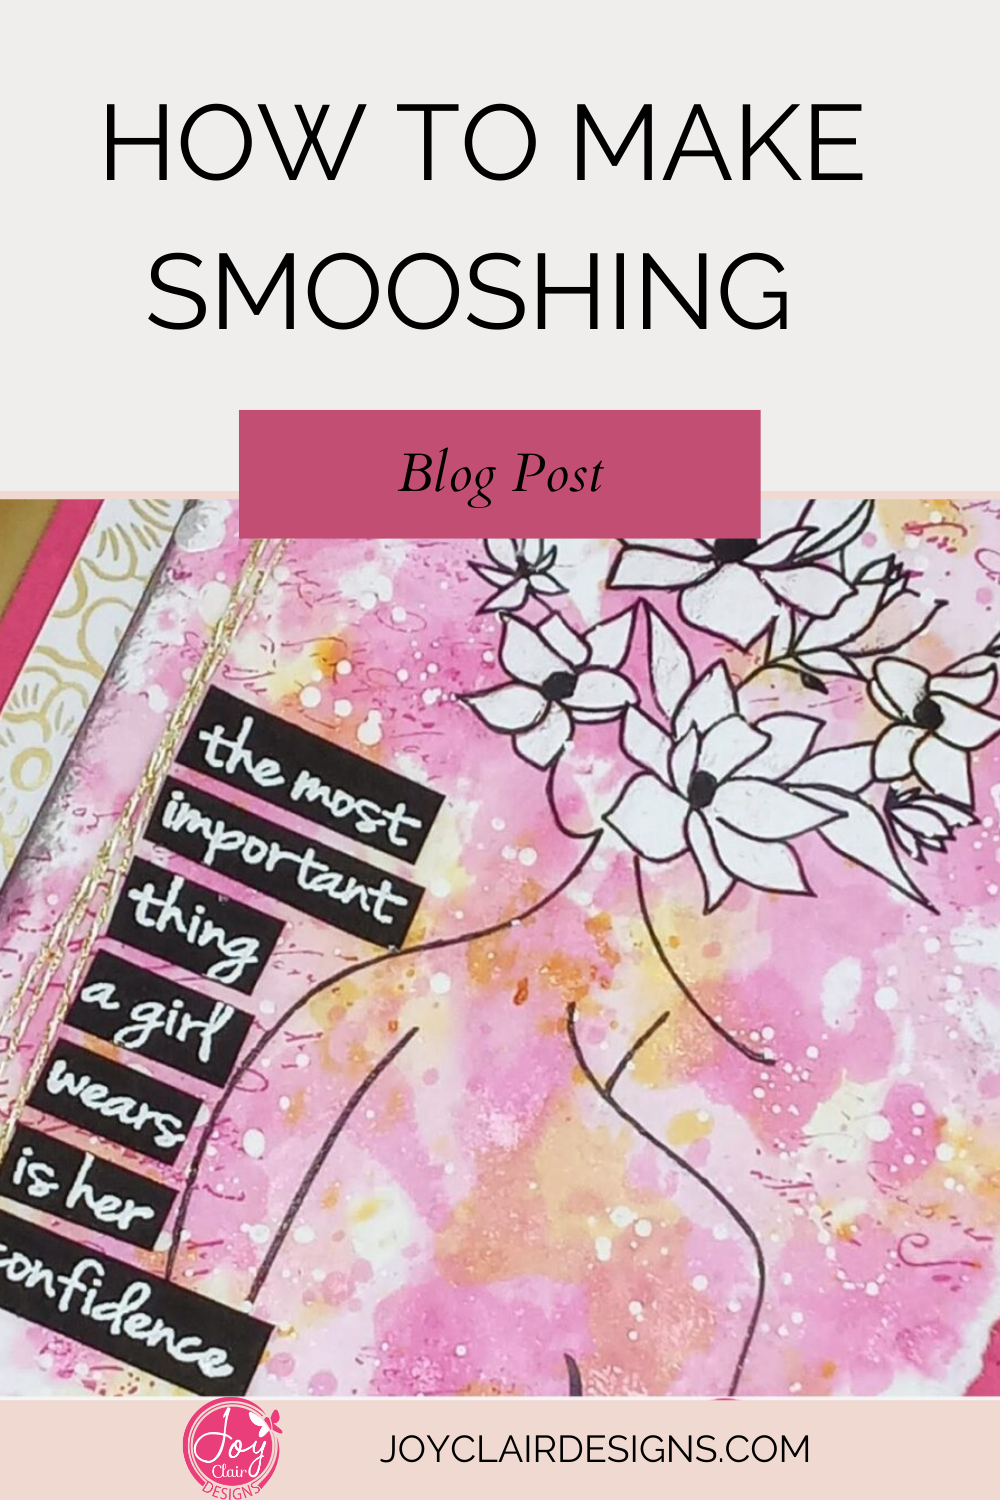
Hello Crafters! I’m Tia from RockyMtnCraftia, I’m very excited to be making my Design Team debut using the beautiful Hey Girl Digital Stamp from Joy Clair Designs. This line drawing is so classically gorgeous, I wasn’t sure I could do it justice by coloring her, so instead opted for a mixed media look. I wanted a soft, layered look and chose to use watercolors using the “smooshing technique”. Smooshing is method of adding wet medium to a sheet of acetate and “smooshing” it onto a piece of paper.
Card Details
The Background
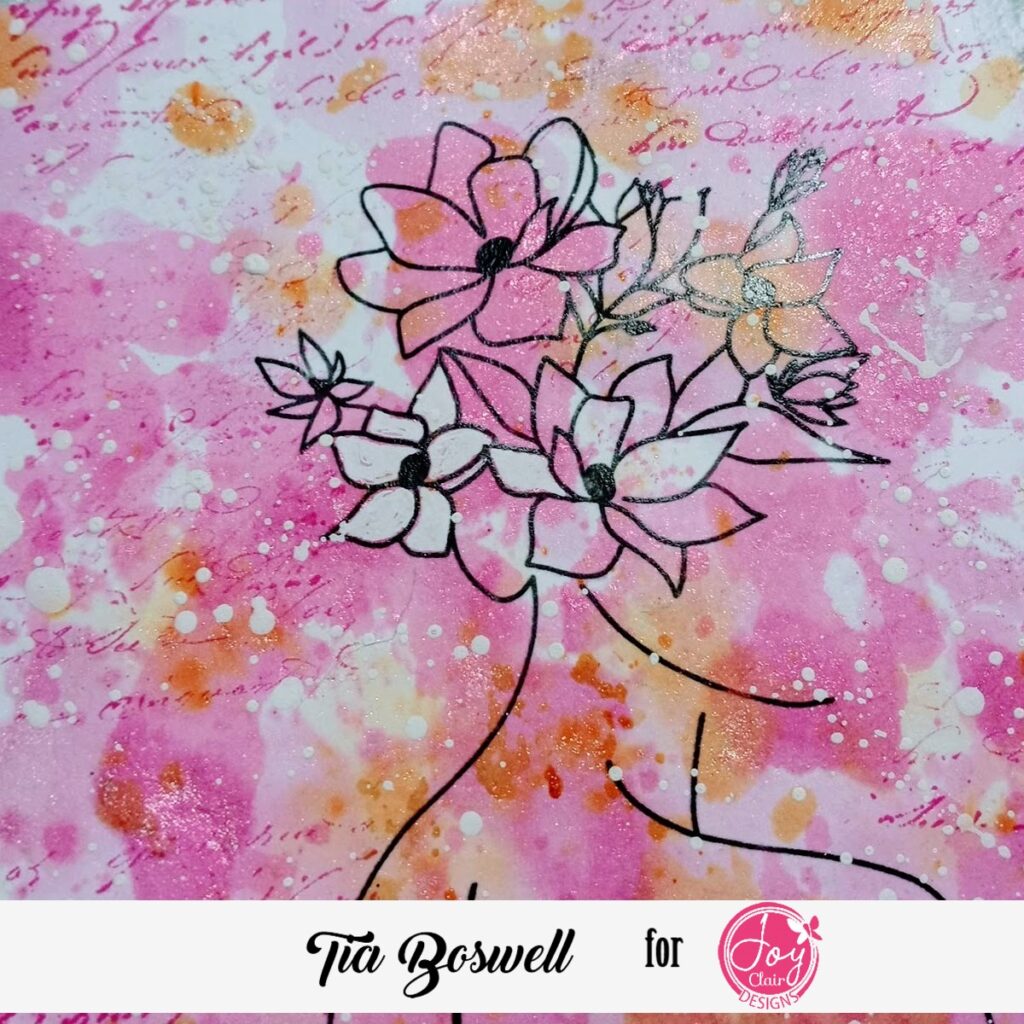
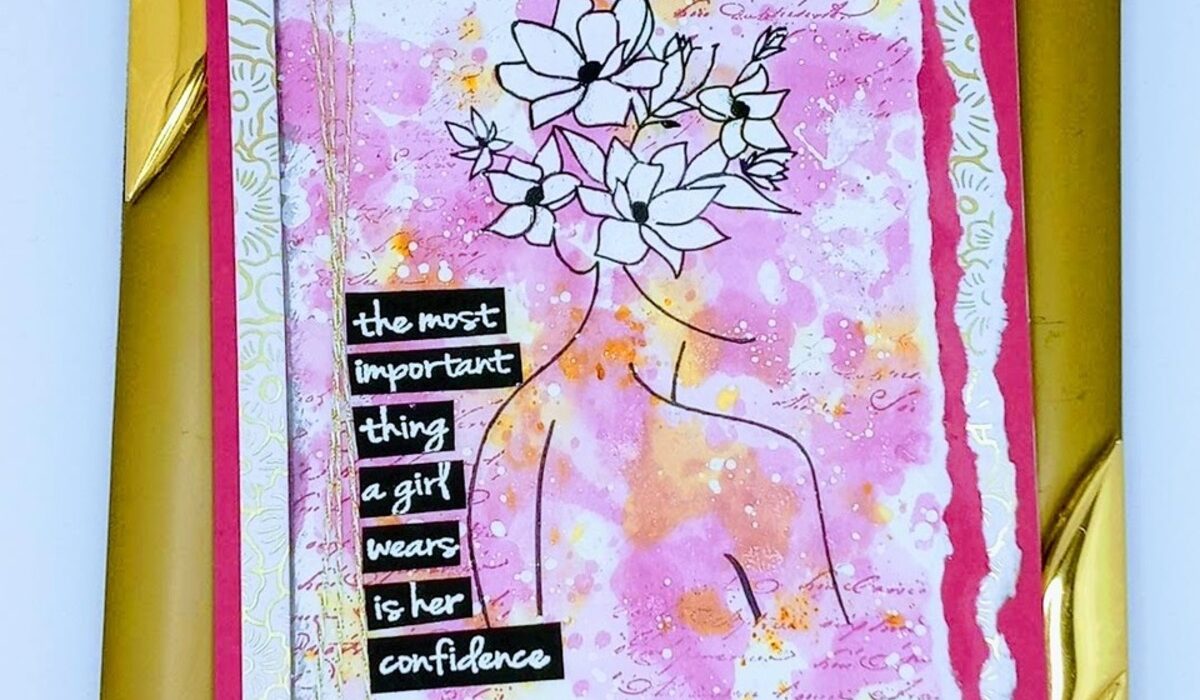
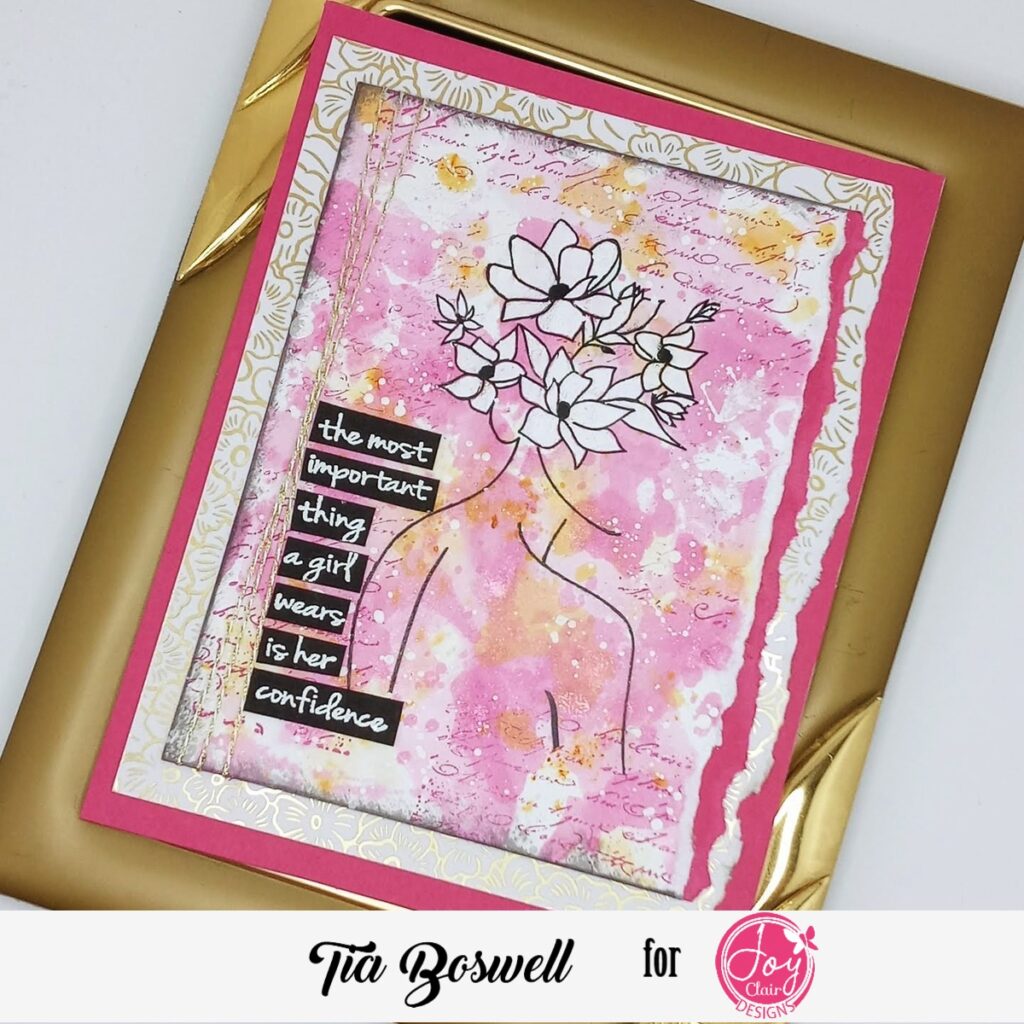
My image was printed out on a 4×5.5 inch piece of Hammermill Premium Color Copy 60 lb. Cover Paper. The background was created using Lindy’s Magicals, the Summer Break set, with colors Umbrella Pink Drink and Teenie Weenie Bikini (yellow). It’s fun adding blobs and lines of light pink watercolor to the acetate and then smooshing it onto cardstock. I like this method because I can control how much color gets used and where.
After layering with the light pink watercolor, I used a hair-dryer to dry the paper so the next color used wouldn’t spread. I then switched to a dark pink watercolor (less water/more powder) and followed the same steps. When I was happy with the amount of pink on my card, I switched to the yellow powder. Taking a clean paintbrush I flicked the yellow powder onto the card. I sprayed water onto the yellow flecks and immediately smooshed them with the acetate. I did this until I was happy with the look of my card. Next I took a “script” stamp and using Picked Raspberry Distress Ink, I randomly stamped it on the card. To finish my background I took a clean paintbrush and dipped it in thinned out white acrylic paint and tapped the end of the brush to flick white droplets all over the card.
Make That Image “POP”
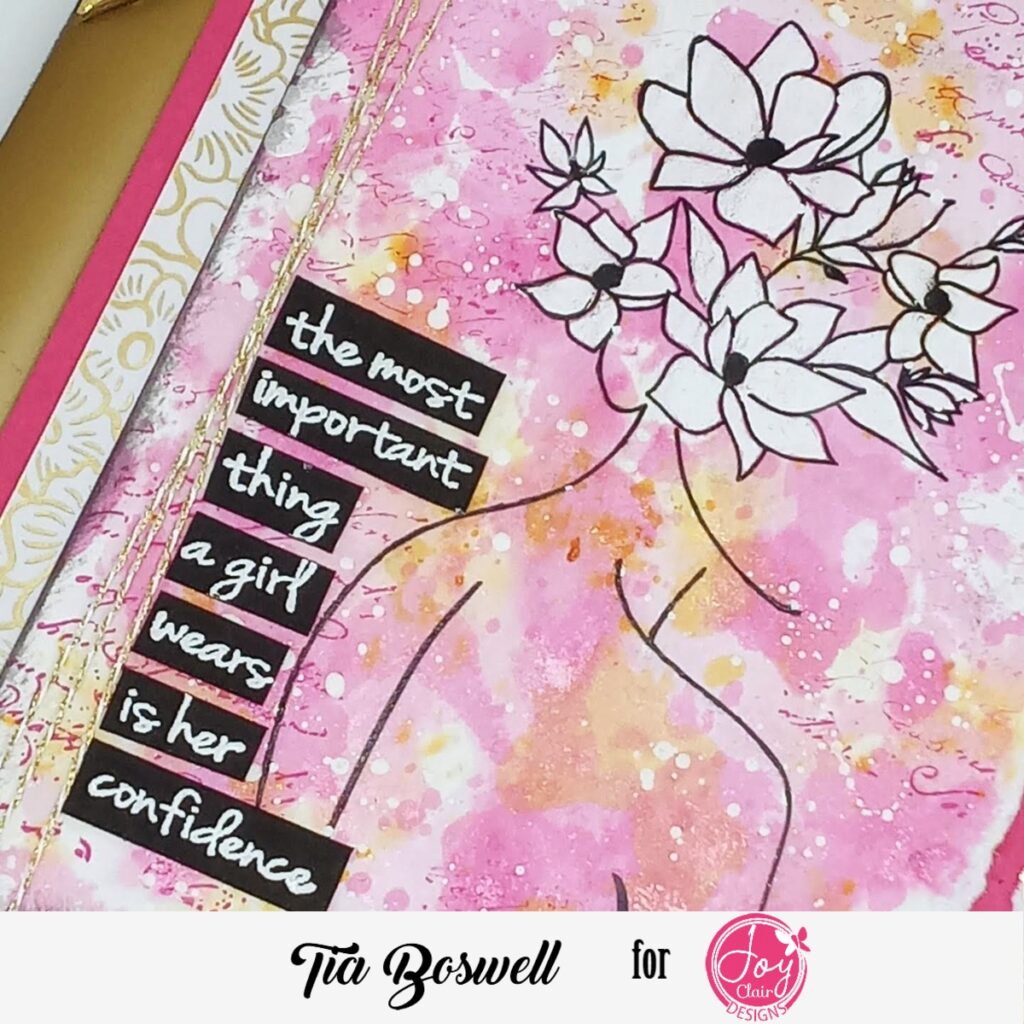
I loved the background of my card, but felt the focal image was getting lost! To bring the main image forward I took a white Gelly Roll pen and colored in all the flower petals. Edging the focal card with Smoke Distress Ink helped it to stand out and tearing the length of the right side added texture. I wrapped gold thread along the length of the left side and taped it behind the card.
Creating Layers
The card was then layered on a piece of dark pink cardstock and again torn down the right side. I wanted to add more gold tones to my card and was happy when I found a piece of gold foiled design paper with flowers and made another layer with it. Additional dark pink cardstock was attached to my 5×6.5 card base and the focal image layers attached to that. At first, I wasn’t going to use a sentiment, but then decided thin word strips in black would look good. I found this sentiment in my stash, I stamped & embossed it in white. Cutting the sentiment up into strips, I then aligned them between the gold threads and the focal image, following the line of the image’s back.
Thanks for following along! If “smooshing” isn’t a technique you’ve used before, give it a try! Until next our next visit-be crafty!
-Tia
Save to Pinterest!
Hey Girl! - Joy Clair Designs
[…] projects on the Joy Clair blog using the Hey Girl digital image set, like this one from Ann or this one from Tia! Both are beautiful and use the exact same image but they are perfectly […]